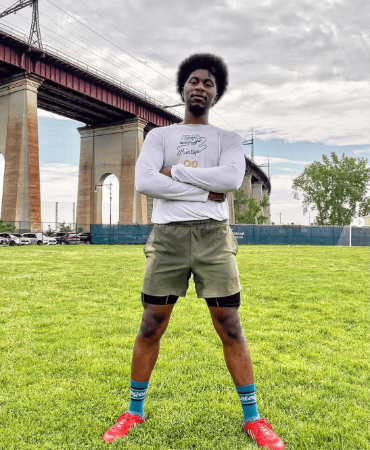
You have been training your fingers, your wrist, and your catch for several chapters now. You have flicked discs to the ceiling from your back. You have spun them on your fingers for minutes at a time. You have slashed and curled and crossed over and kerfuffled your way through hundreds of reps. Your hands are ready. Your muscles are ready.
Now you stand up, face a target, and throw for real. Horizontal. With distance. With purpose.
This chapter teaches you the two throws that everything else in Ultimate builds on: the backhand and the flick forehand. Think of them like a boxer's jab and cross. The jab is the backhand. Reliable, natural, sets everything up. The cross is the flick. Explosive, fast, finishes the point. A boxer who only has a jab is predictable. A boxer with both is dangerous. You are going to be dangerous.
One important thing before we begin. In this chapter, you are throwing at a target. A trash can, a tree, a cone, a fence post, a disc golf basket. Not a partner. Not a teammate. A target that does not move, does not judge you, and does not care how many times you miss before you hit it. That target is your training partner for everything in this chapter. Find one before you read any further.
The Wet Disc Challenge
There is something that nobody warns you about when you first start throwing, and it will catch you off guard the first time it happens. The disc gets wet. And when it does, everything changes.
Morning dew on the grass soaks into the disc when you pick it up after a throw. A light rain makes the surface slick. Your own sweat on a hot day coats the rim. Sunscreen on your hands, which you should absolutely be wearing, transfers to the plastic and makes it feel like you are gripping a bar of soap.
A wet disc is dramatically more difficult to throw and catch. Your grip slips. Your release point shifts because the disc slides out of your fingers a fraction of a second earlier than expected. Your carefully trained wrist snap loses its bite because the disc is not locked into your hand the way it was when everything was dry.
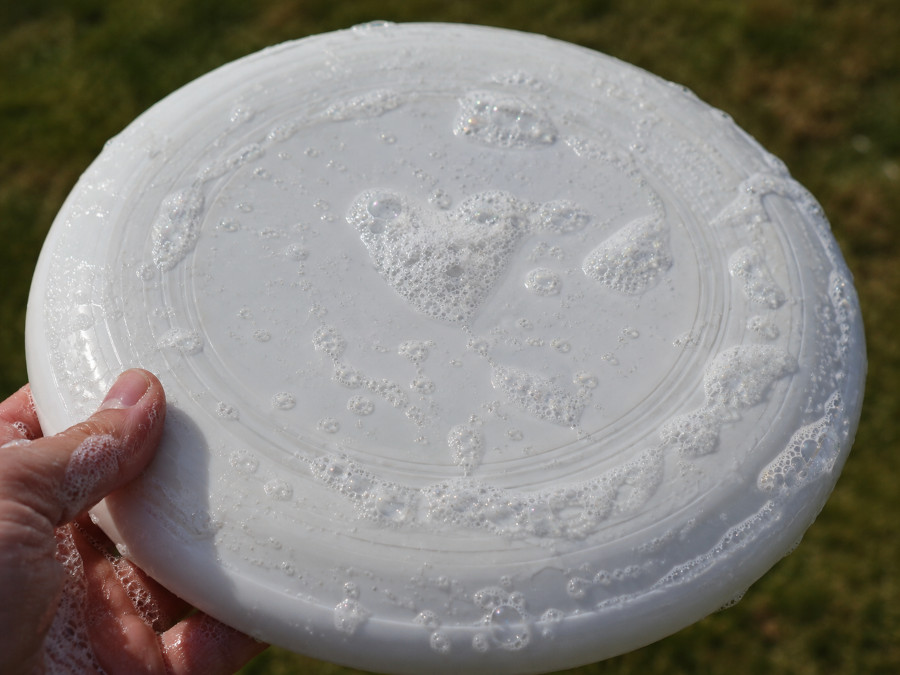
I bring this up now because as you learn the backhand and flick in this chapter, you should practice in all conditions. Dry days and wet days. Hot days when your palms sweat and cold days when your fingers are stiff. If you only ever throw when conditions are perfect, you are training for a world that does not exist. Games happen in the rain. Games happen in the heat. Games happen on dewy morning fields where the disc is slippery before the first throw.
The players who can throw a clean, spinning disc when it is wet are the players who practiced when it was wet. Start now.
PART 1: THE BACKHAND
The Most Natural Throw You Will Ever Learn
I learned to throw the backhand with my dad.
That was the earliest moment of my Frisbee journey. I grew up in Oklahoma, and we did not have Ultimate Frisbee there. But we had Frisbees. We would go out to the local park behind the elementary school near our house, and we would throw. There was a big black disc I remember, kind of like an UltraStar. And a pink one with a hologram on the front that I thought was the coolest thing in the world.
My dad was my first tossing partner. And we threw nothing but backhands, because we did not even know the flick existed.
That is how natural the backhand is. It is the throw your body already understands, even if you have never played a minute of Ultimate in your life. And here is a fun way to prove it to yourself.
Imagine you are holding a dinner plate. Thumb on top, fingers underneath. Now imagine you need to fling that plate across the room. Not drop it. Fling it. What does your body want to do? It wants to pull the plate to one side, wind up, and sling it forward with a spinning motion. That is the backhand. Your body invented it without anyone teaching you.
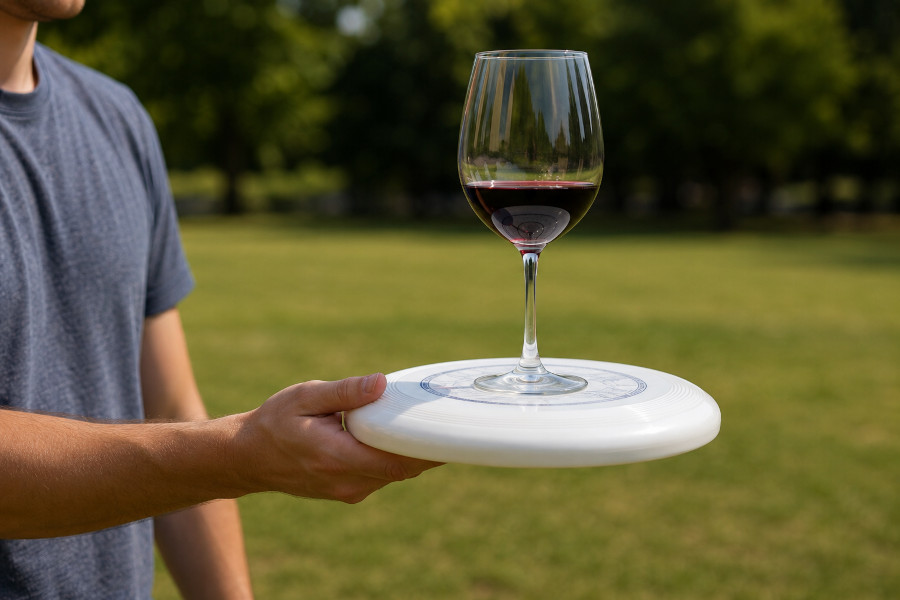
Now imagine you need to balance a glass of water on that plate while you grip it firmly enough to throw. Feel that grip. Thumb pressing down on top, fingers locked underneath, strong and stable. That is the grip you need for the backhand. Firm enough to withstand the force of the spin as the disc whips out of your hand. Controlled enough to aim it where you want.
The backhand is the throw you will use most in a game. Even when the defense is forcing you to throw the flick, you will still find ways to get your backhand off. It is your safety net. It is your foundation. It is the throw you can always fall back on when your flick is not feeling right, when the wind is howling, or when you just need to put the disc somewhere safe.
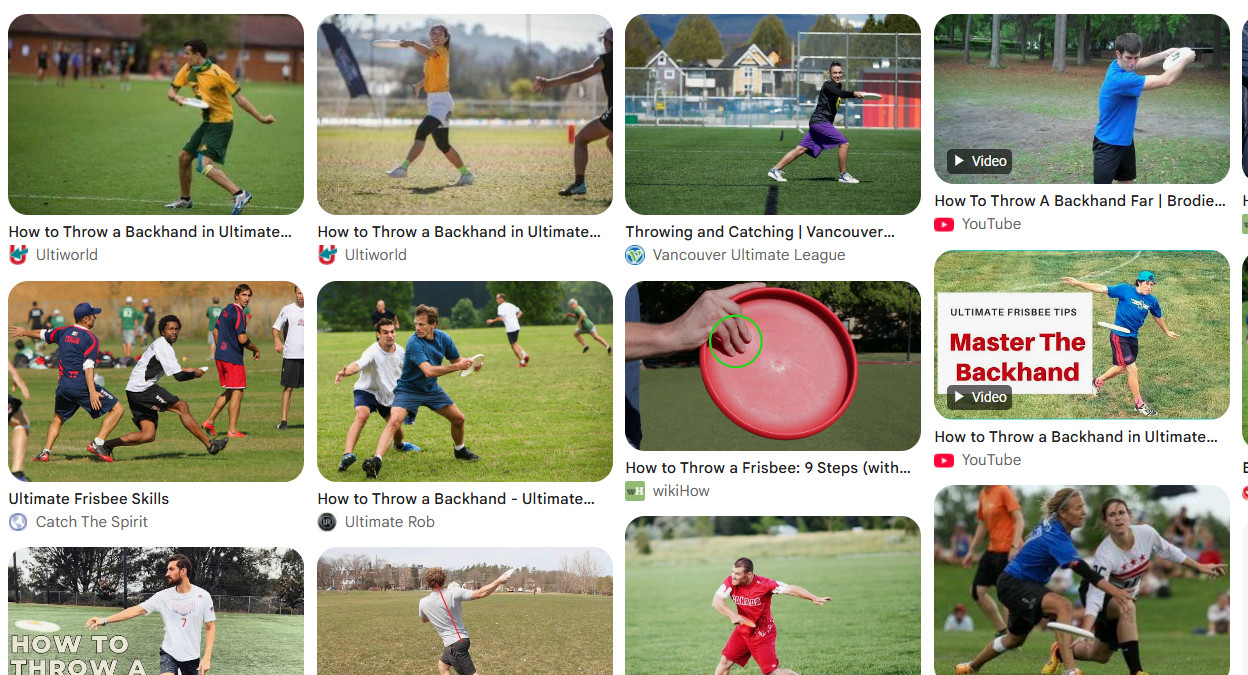
Today I can throw my backhand at least 80 yards with my right hand and 50 to 60 yards with my left. It is my strongest, most confident throw. And in the next few sections, I am going to teach you everything I know about it.
Finding Your Grip
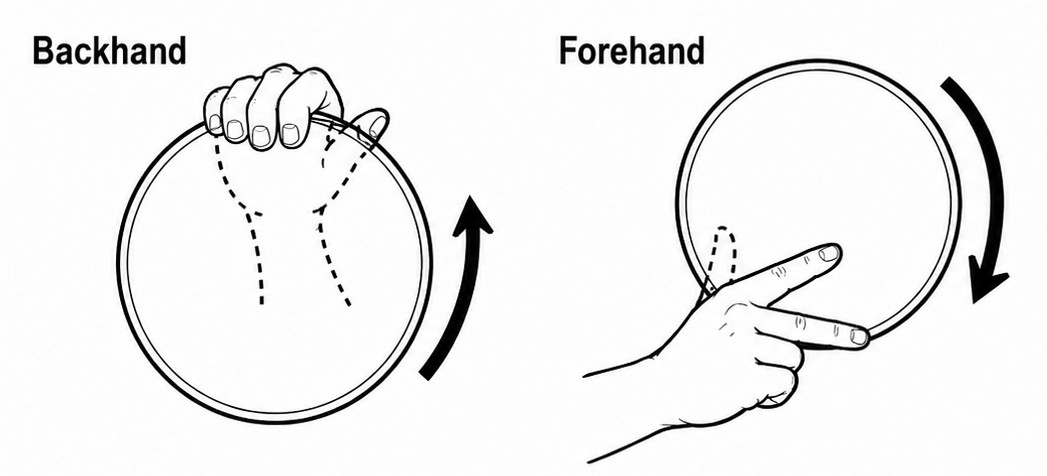
The grip is where everything starts, and the truth is that only you can find the grip that works for your hand. My fingers are different lengths than yours. My grip strength is different. What feels locked in and controlled for me might feel awkward and loose for you. So instead of telling you exactly where to put each finger, I am going to give you three options and tell you to throw a hundred backhands with each one until you find the one that feels like home.
The basics are the same for all three: thumb on top of the disc, pressing down. Four fingers curled underneath the rim, pressing up. The disc is sandwiched between your thumb and your fingers, and the friction between them is what holds it in place when all that kinetic energy starts whipping through your arm.
The variable is your index finger. This is the finger that changes everything about how the throw feels.
Option 1: Index finger fully on the outer rim. Your index finger wraps around the outside edge of the disc, almost like a pointer finger showing the disc which direction to go. This gives you more precision and direction, but less raw power. It feels a bit like the push pass grip, and it works beautifully for short, accurate throws where you need to put the disc exactly where you want it.
Option 2: Index finger fully tucked under. All four fingers are together underneath the rim, gripping as a unit. This gives you maximum power because all four fingers are contributing to the grip and the snap. But you lose some of the fine directional control that the index finger provides when it is on the rim.
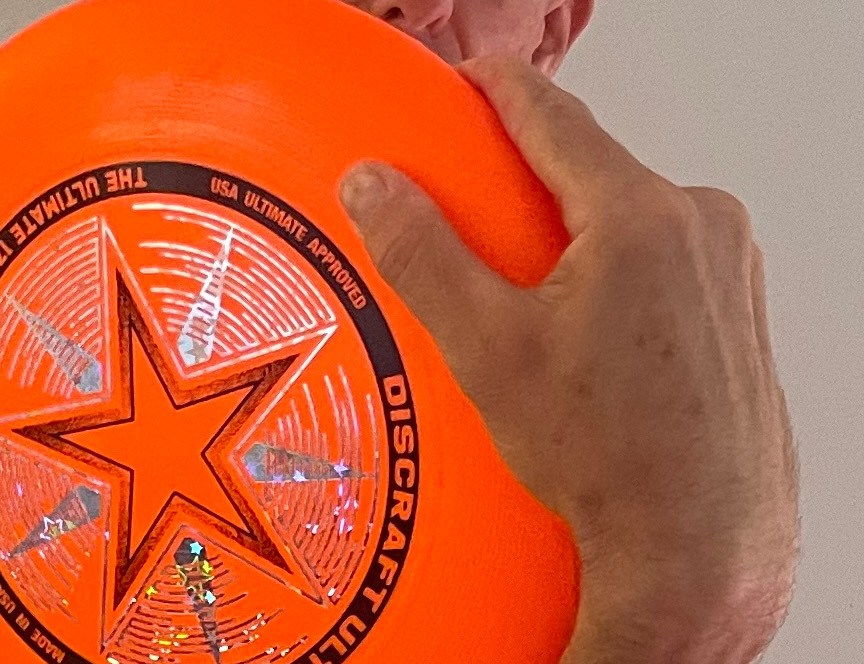
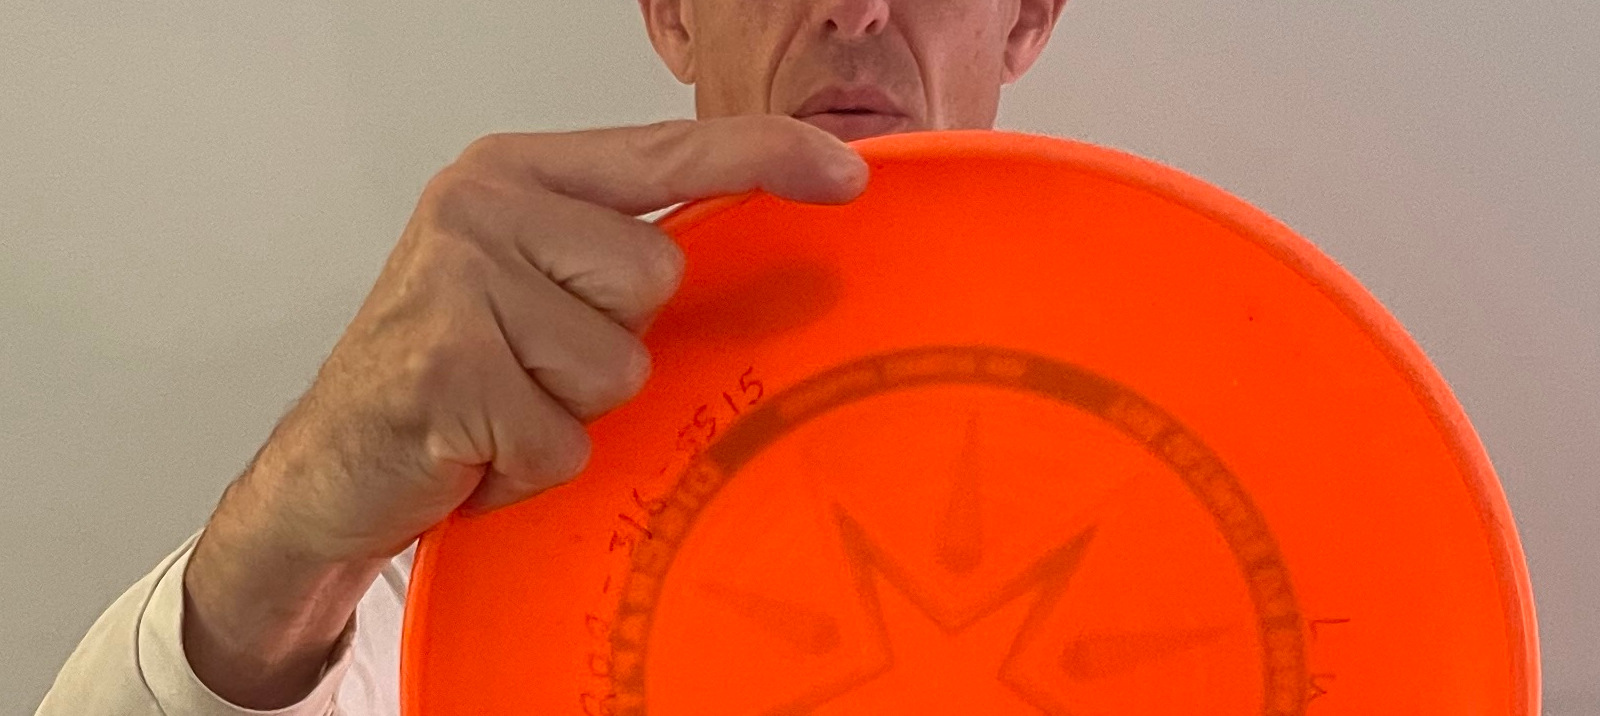
Option 3: Index finger halfway on the rim. This is what I do most of the time. My index finger sits halfway on the rim and halfway tucked under, kind of resting on the edge. It gives me the best of both worlds. I get good control and good power. It feels balanced.
Here is the thing about grip that catches most beginners off guard: the pressure changes throughout the throw. It is not static. You do not just grab the disc tight and hold on for dear life.
Start loose. When you first pick up the disc and settle into your grip, it should feel relaxed. Like you are holding a bird. Firm enough that it will not fly away, gentle enough that you are not crushing it.
As you begin to coil and load up your throw, the grip should tighten naturally. Your fingers sense the energy building and they respond by holding on more firmly. Just before the release point, you want a strong, confident grip because the disc is about to experience a tremendous amount of force as it spins and rips out of your hand.
Then you let go. Your thumb lifts, your fingers release, and the disc flies. The whole sequence, loose to firm to release, should feel like a single flowing motion. Not three separate steps.
If you grip too tight the entire time, two things go wrong. First, the disc sticks in your hand too long and releases late, sending it into the ground. Second, your forearm tenses up, which kills the natural whip motion of your wrist. Tension is the enemy of the backhand. It slows everything down.
If you grip too loose the entire time, the disc slips out early or wobbles because you did not have control of it when the spin was building.
The sweet spot is the transition. Loose to firm to release. Practice it consciously at first. Over time, it becomes automatic.
The Coil and the Uncork
Here is the most important concept to understand about the backhand. It is not about your arm. It is about your entire body.
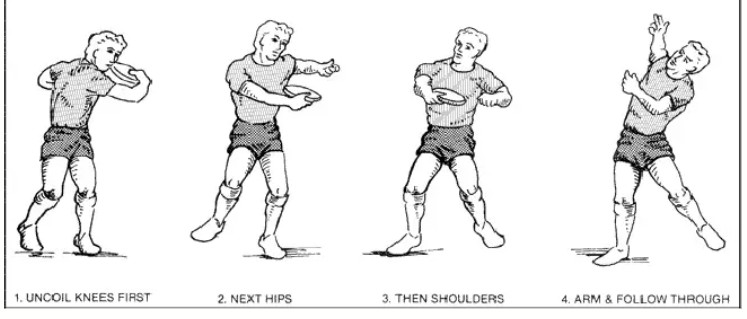
The backhand is all about coiling up energy in your hand, your wrist, your arm, your bicep, your torso, and your hips, and then uncorking it. Releasing all of that stored kinetic energy in one controlled, explosive motion.
Think about winding up a rubber band on a toy airplane propeller. You twist and twist and twist, loading energy into the rubber band with every turn. And then you let go. All that stored energy converts into motion instantly. The propeller spins like crazy because you loaded it up patiently and released it all at once.
Your body is the rubber band. The disc is the propeller.
The backhand is similar to a golf swing, but on the opposite side of your body. You can coil up more kinetic energy with the backhand than with any other throw in Ultimate. That is why the backhand is the throw that goes the farthest for most players. Your entire body can contribute to the coil, from your planted feet all the way up through your hips, core, shoulder, arm, wrist, and fingers.
When you uncoil that energy, it creates spin. And spin is everything. Spin is what keeps the disc stable in the air. Spin is what makes it resist the wind. Spin is what turns a wobbly chunk of plastic into a flat, cutting, beautiful throw that sails 60 yards and drops right into someone's hands.
Gotta have spin to win. Spin wins games.
For beginners, I have one simple instruction: just coil and chuck it as hard as you can. I tell kids this all the time. Wind it up inside your body and then let it go. Release it somewhere into the sky. It does not matter where. Just feel what it is like to load up all that energy and unleash it. Throw it at a big open field or at your target from 10 feet away. Get comfortable with the feeling of your body being a spring that you compress and then release.
As you become more experienced, you learn to control where that energy goes. Instead of randomly launching it at the sky, you release at a specific point where you know the disc will float, carry, and arrive exactly where you envision it landing. But that precision comes later. For now, just throw.
The Backhand Motion: Step by Step
Let me walk you through the motion one piece at a time, like a slow motion replay that you can follow along with a disc in your hand.
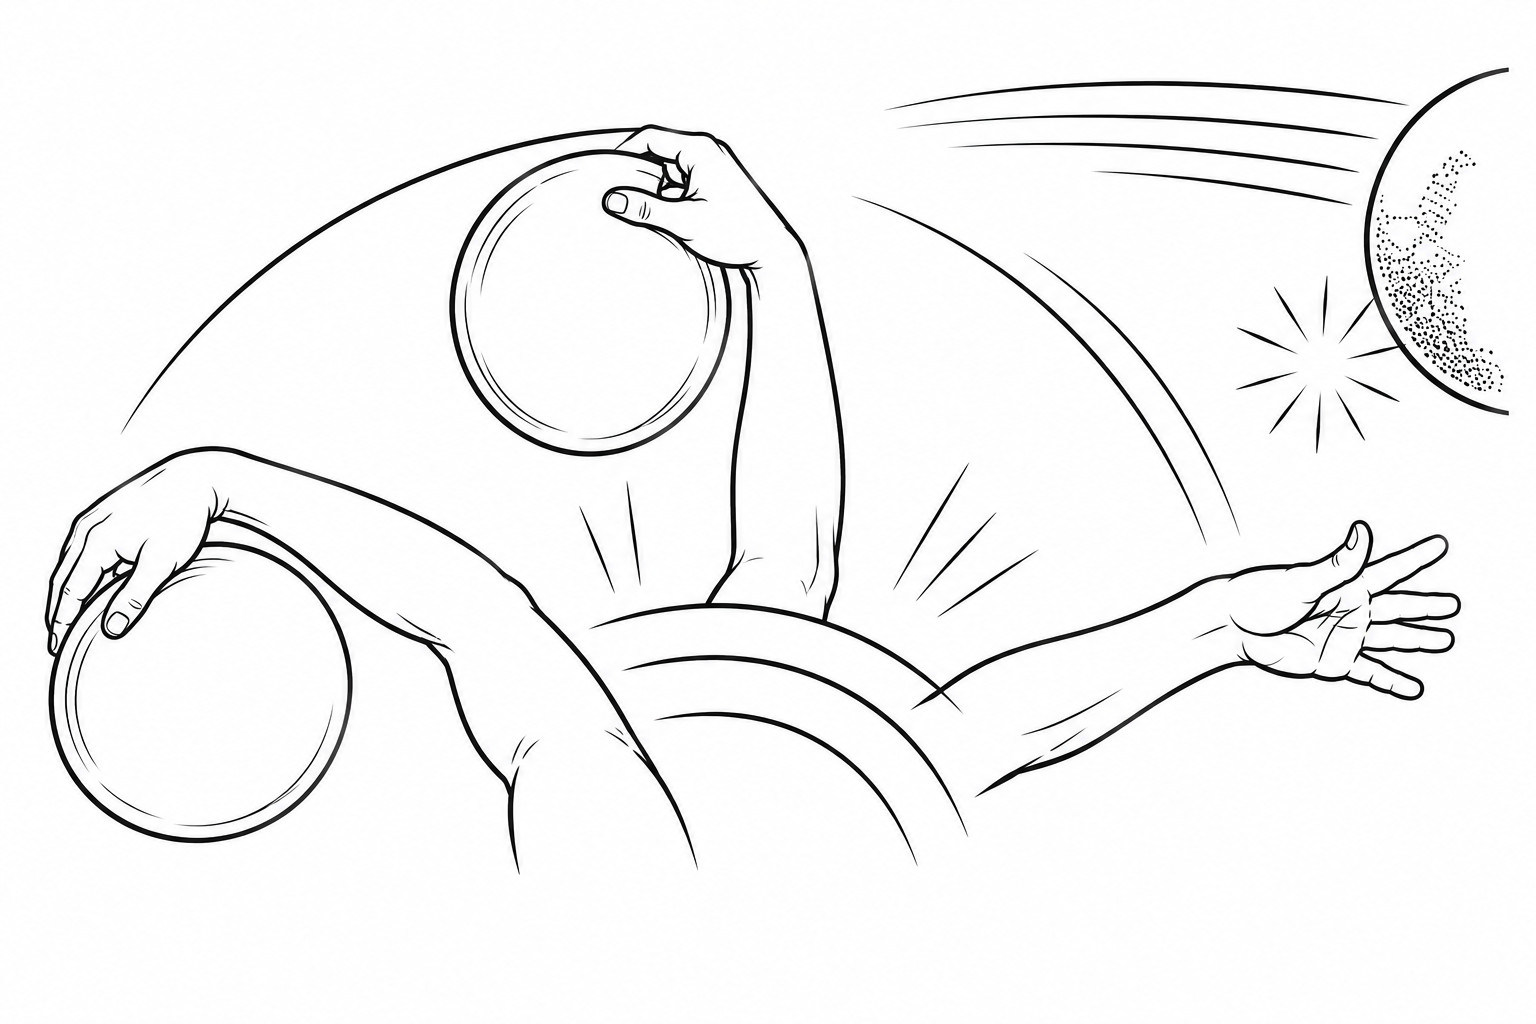
Step 1: Grab the disc. Find your grip. Fingers on the bottom, thumb on top. It should feel relaxed and confident, like you could hold it all day without getting tired. Think of it as the glass of water on the plate. You want it secure but not clenched.
Step 2: Stand sideways. Turn your body so you are perpendicular to your target. Your non throwing shoulder should point toward where you want the disc to go. You do not have to stand perfectly perpendicular. You can also face your target and just twist your torso. But starting sideways gives you the most natural range of motion for the coil.
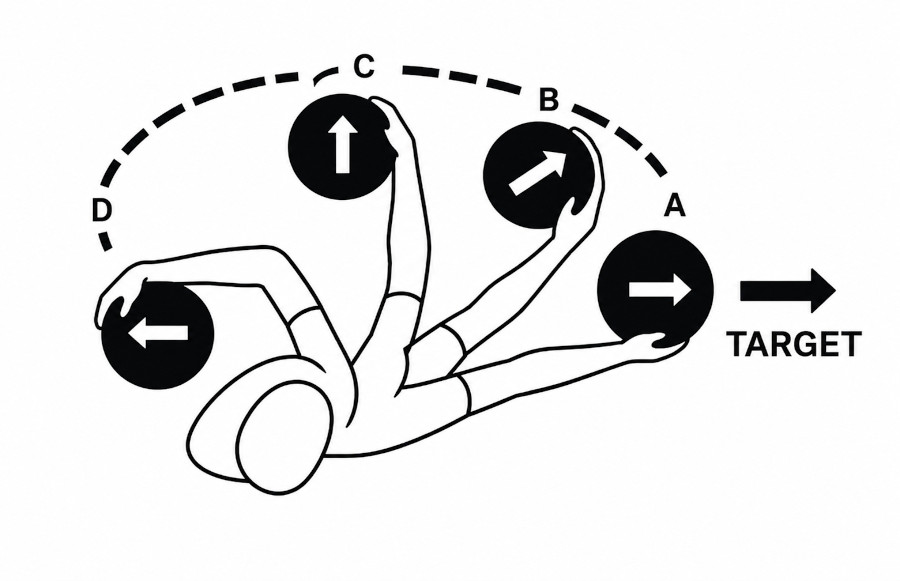
Step 3: Coil the disc into your arm. This is the loading phase. Curl your wrist so the disc is almost over your forearm. Curl deeper so your bicep flexes slightly. Now twist your torso away from your target, just a little bit at first. You should feel the stored energy mounting in your core and shoulder, like pushing a spring back. The further you coil, the more energy you store. But do not sacrifice balance for depth. Only coil as far as feels natural and stable.
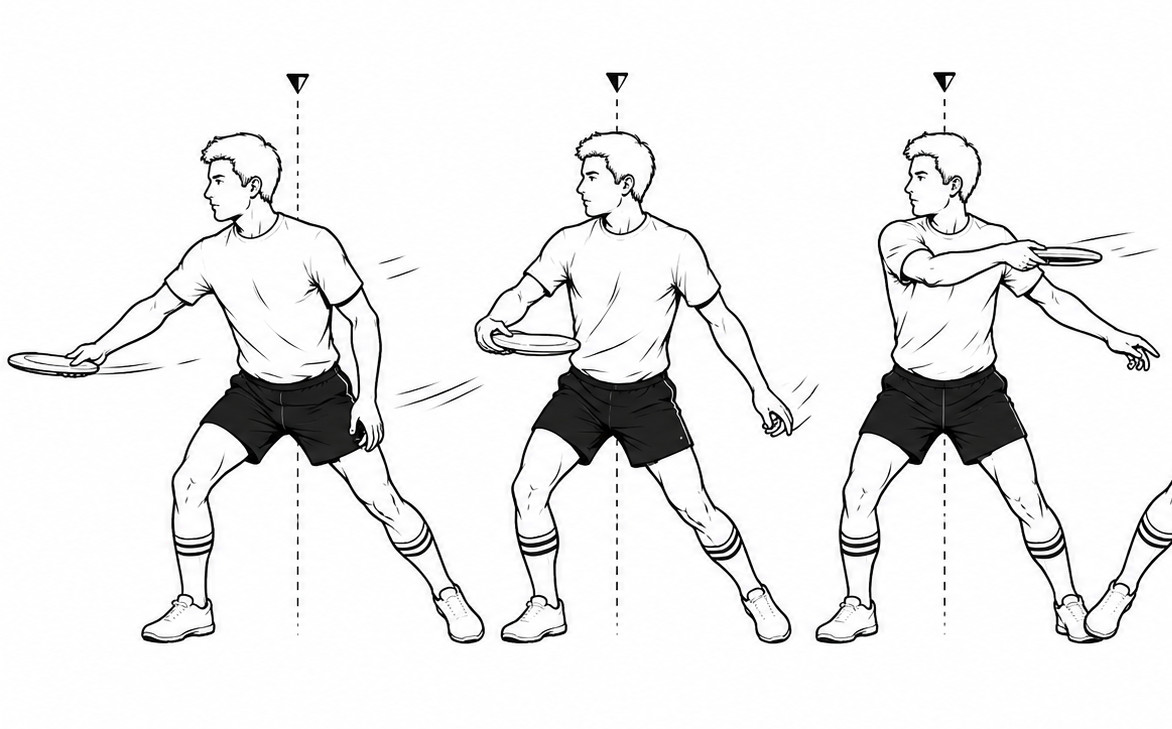
Step 4: Uncoil. When you feel enough energy has been built, begin to turn. Start with your hips. They drive forward first. Your torso follows your hips. Your shoulder follows your torso. Your arm follows your shoulder. Your wrist follows your arm. And your fingers follow your wrist. Each link in the chain moves progressively faster than the one before it, like a whip accelerating from handle to tip.
Step 5: Release where you want it to go. Wherever your arm is pointing at the moment you let go, that is where the disc will go. Point at the ground, it goes to the ground. Point up, it goes up. Point at your target, it goes to your target. The release point is not a position. It is a moment in time. Maybe 20 to 30 milliseconds. Your body learns to find that moment through repetition, not through thinking about it.
Step 6: Follow through. Let your arm and fingers continue their arc after the disc is gone. Do not stop your arm at the release point. Let it keep swinging, just like a golf swing continues after the club hits the ball. The follow through should feel natural and smooth, like your arm is decelerating on its own. If you stop your arm abruptly, you are robbing the throw of its final burst of energy and your accuracy will suffer.
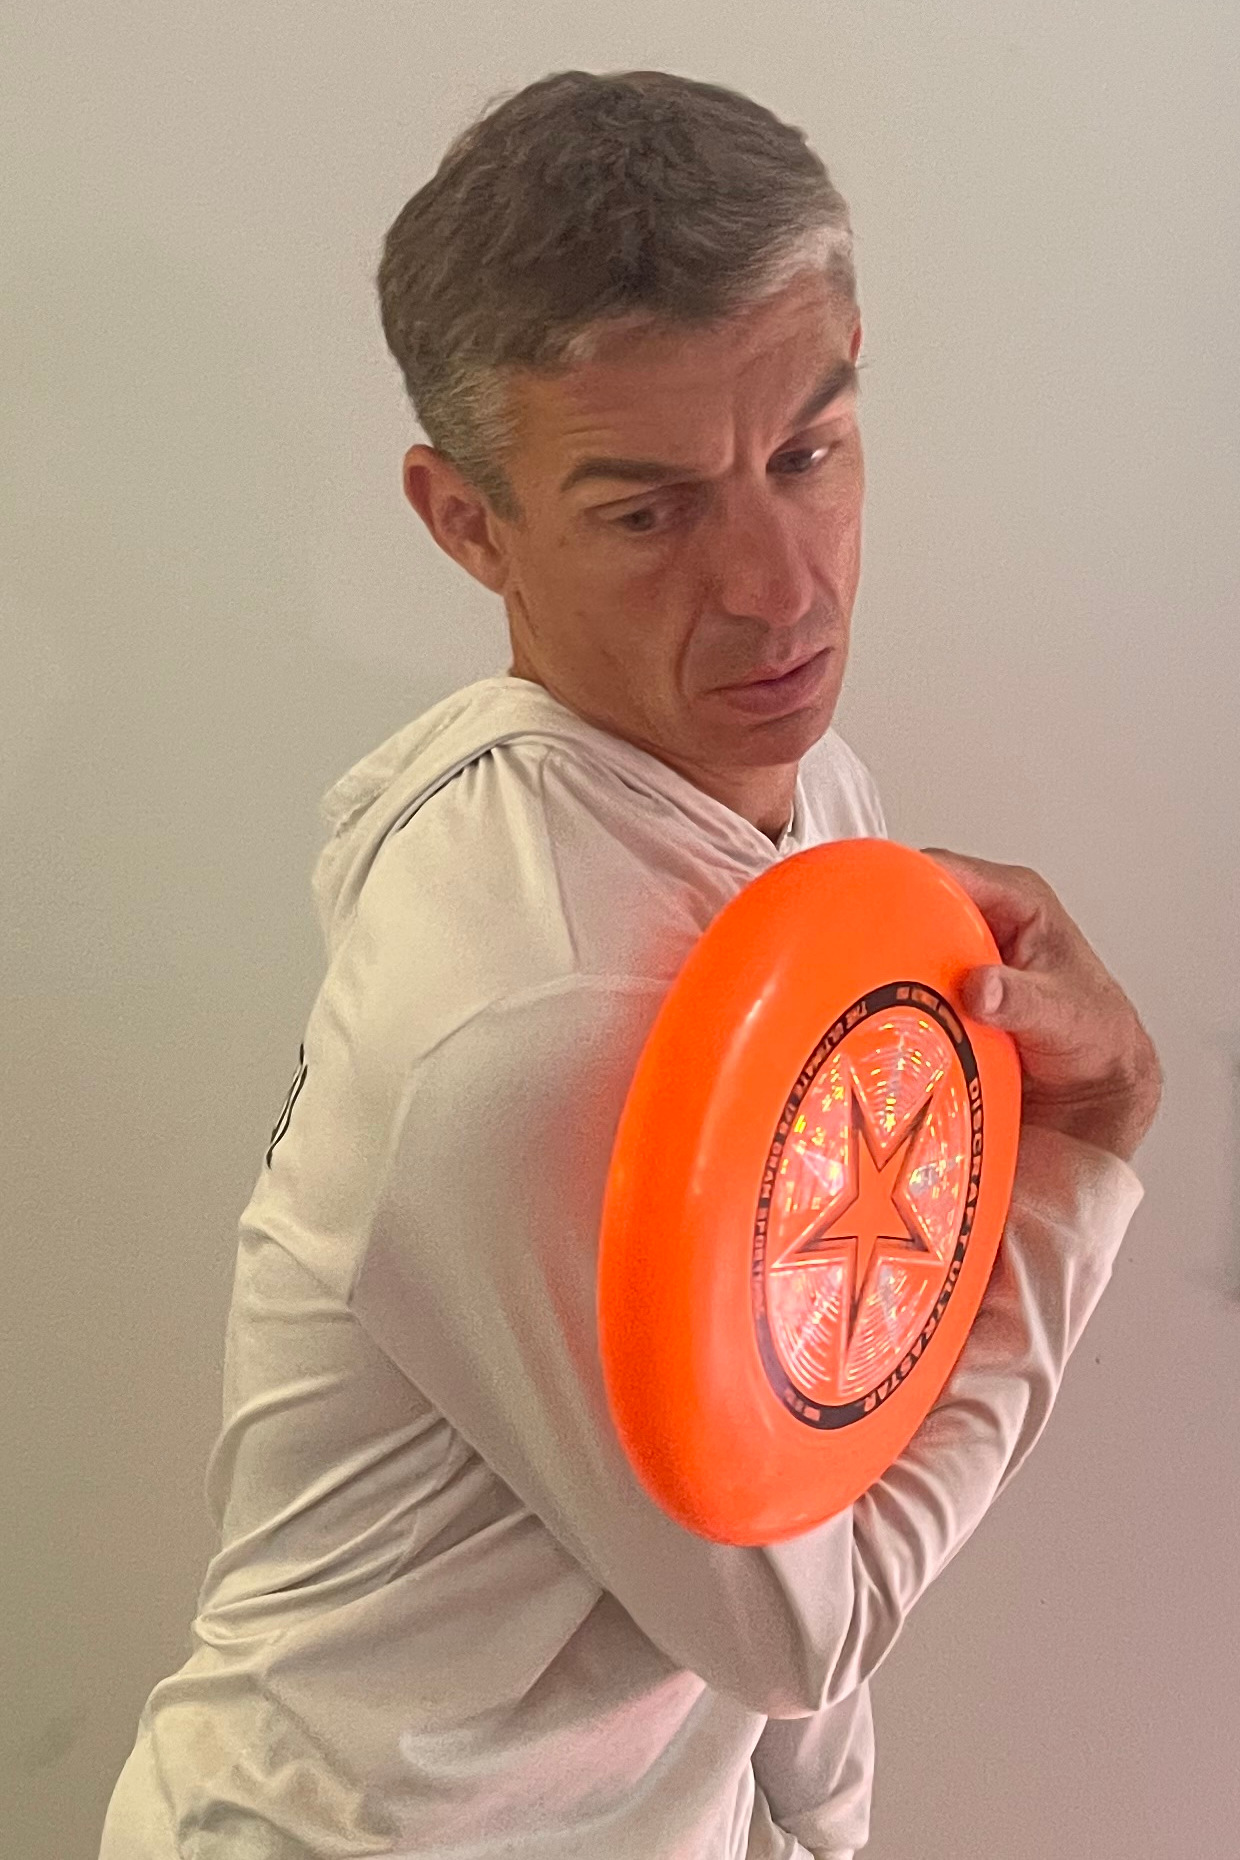
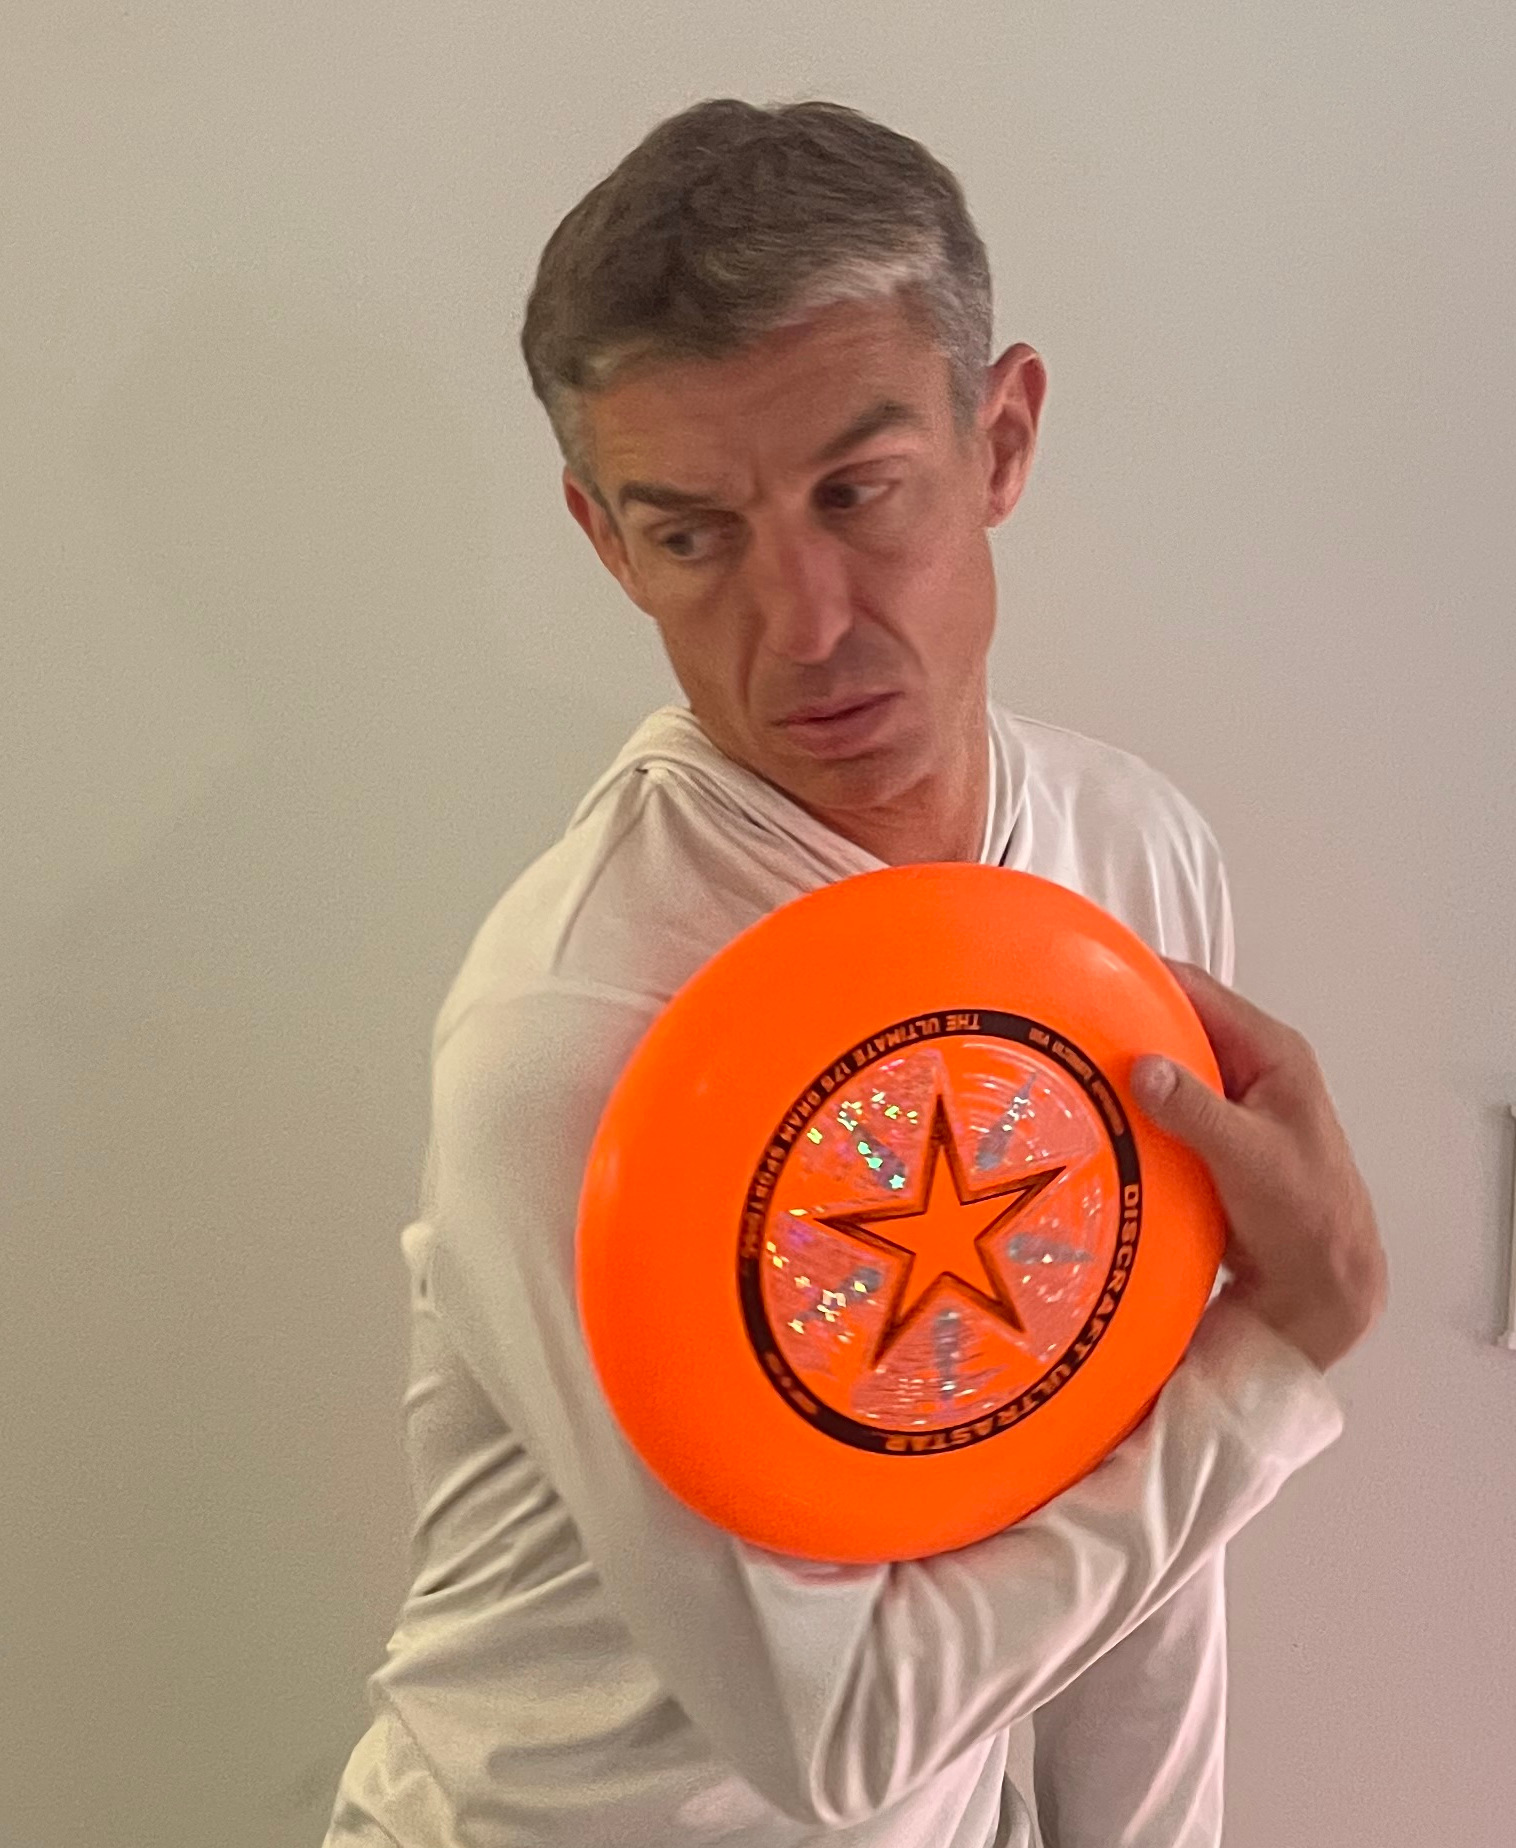
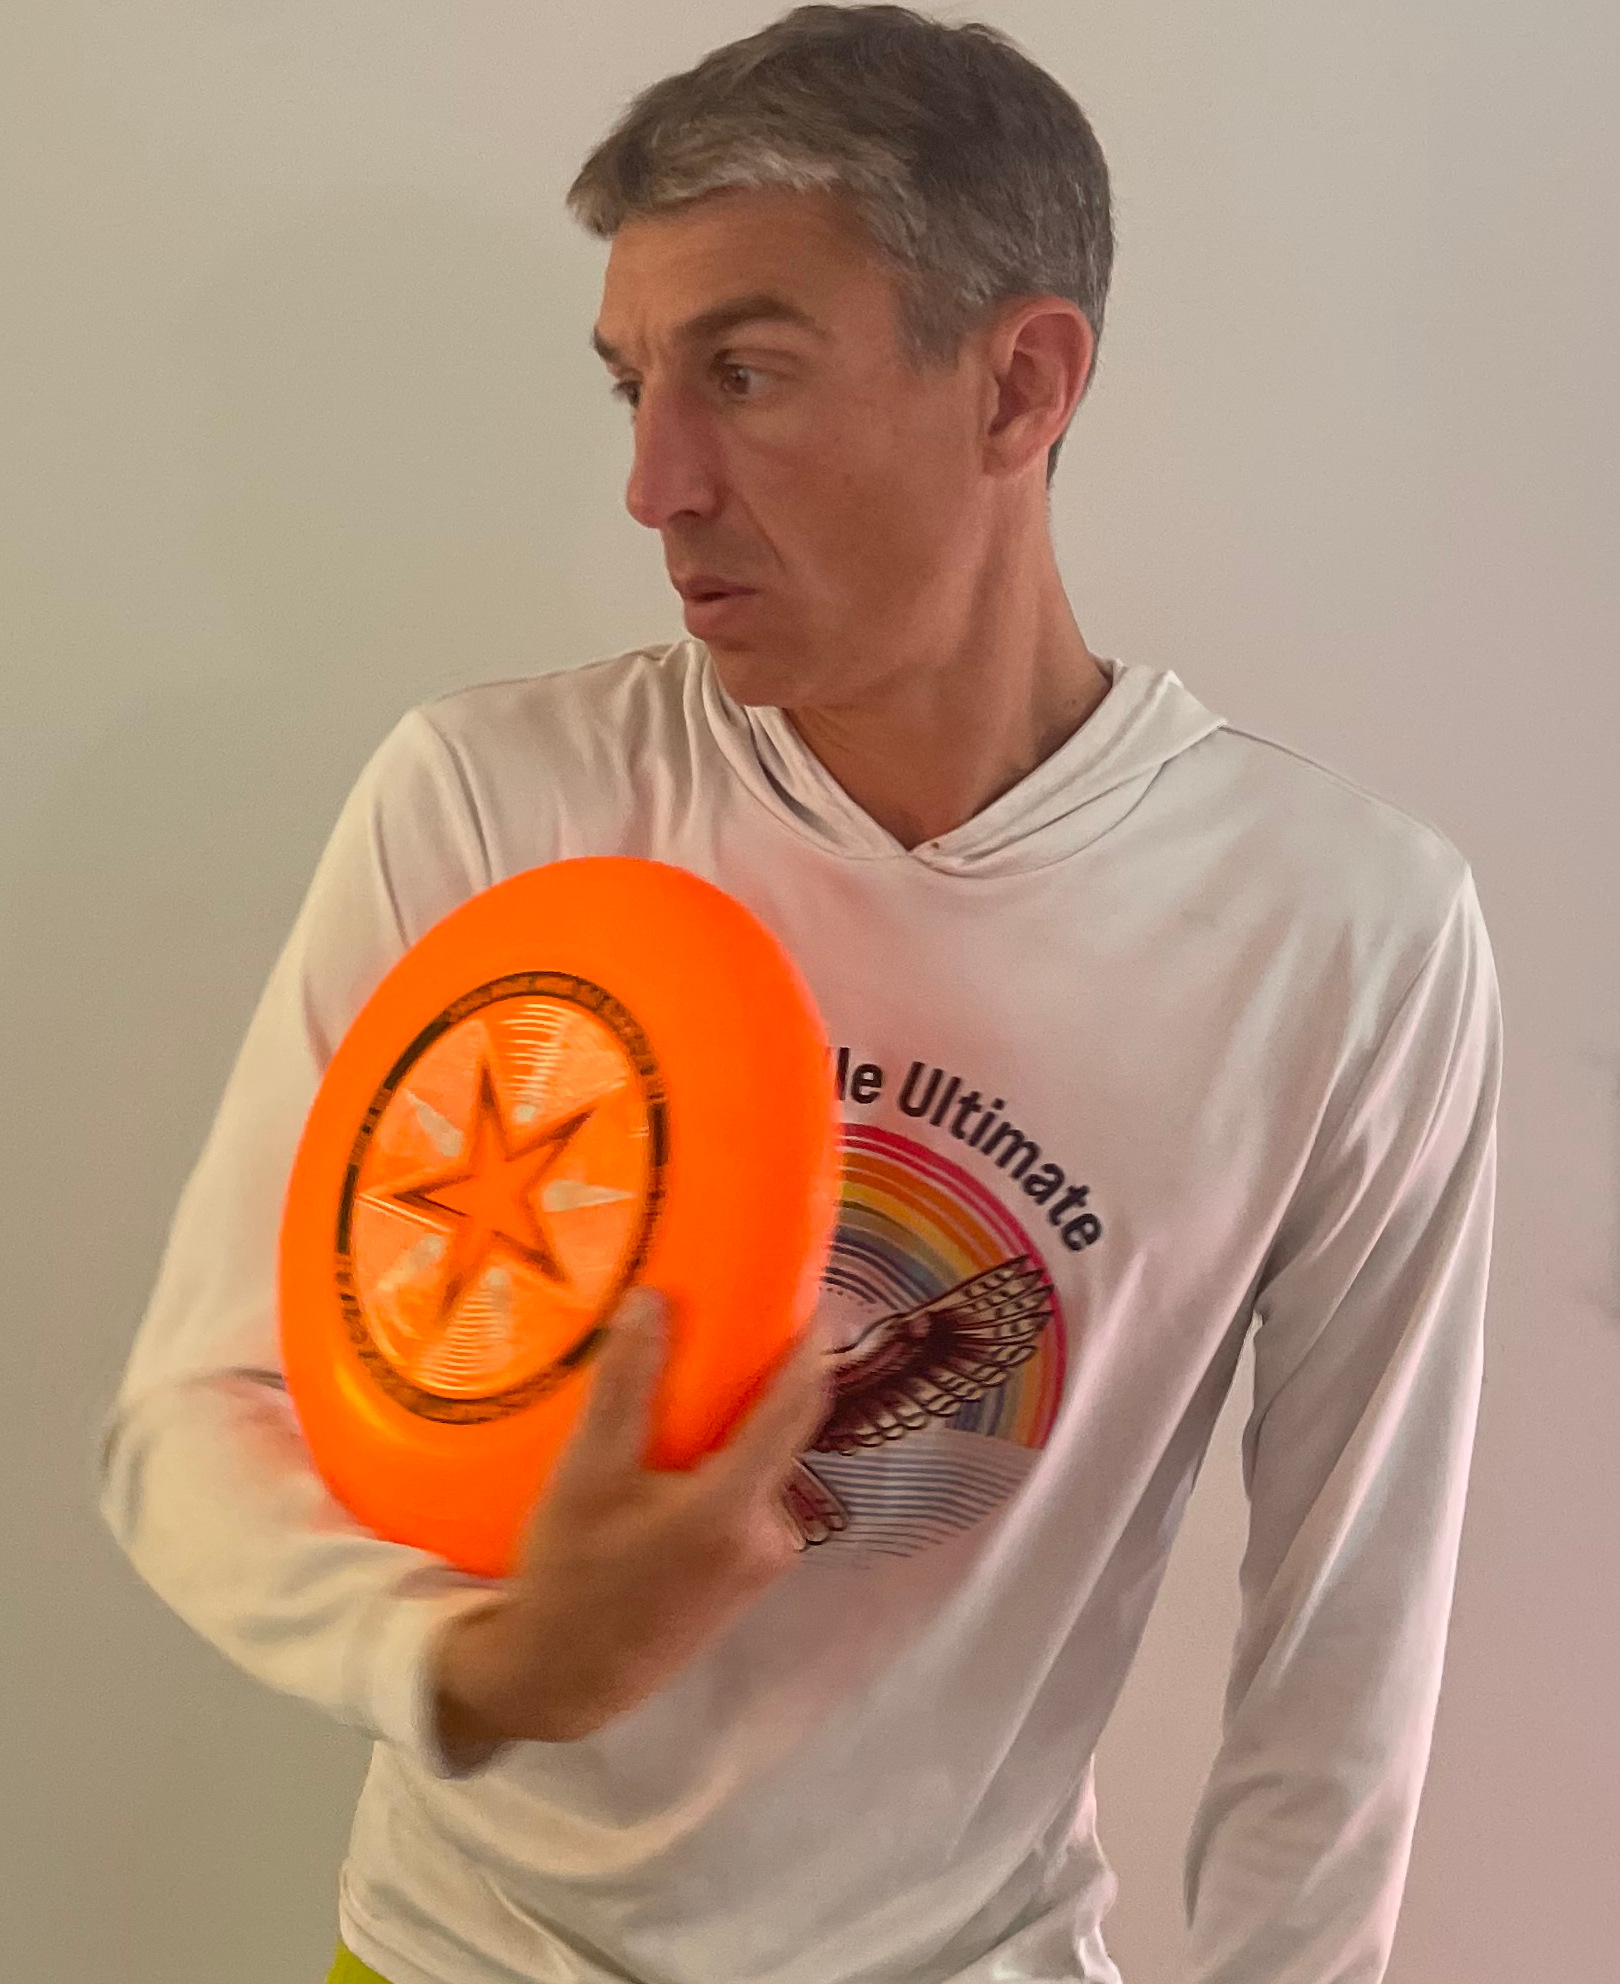
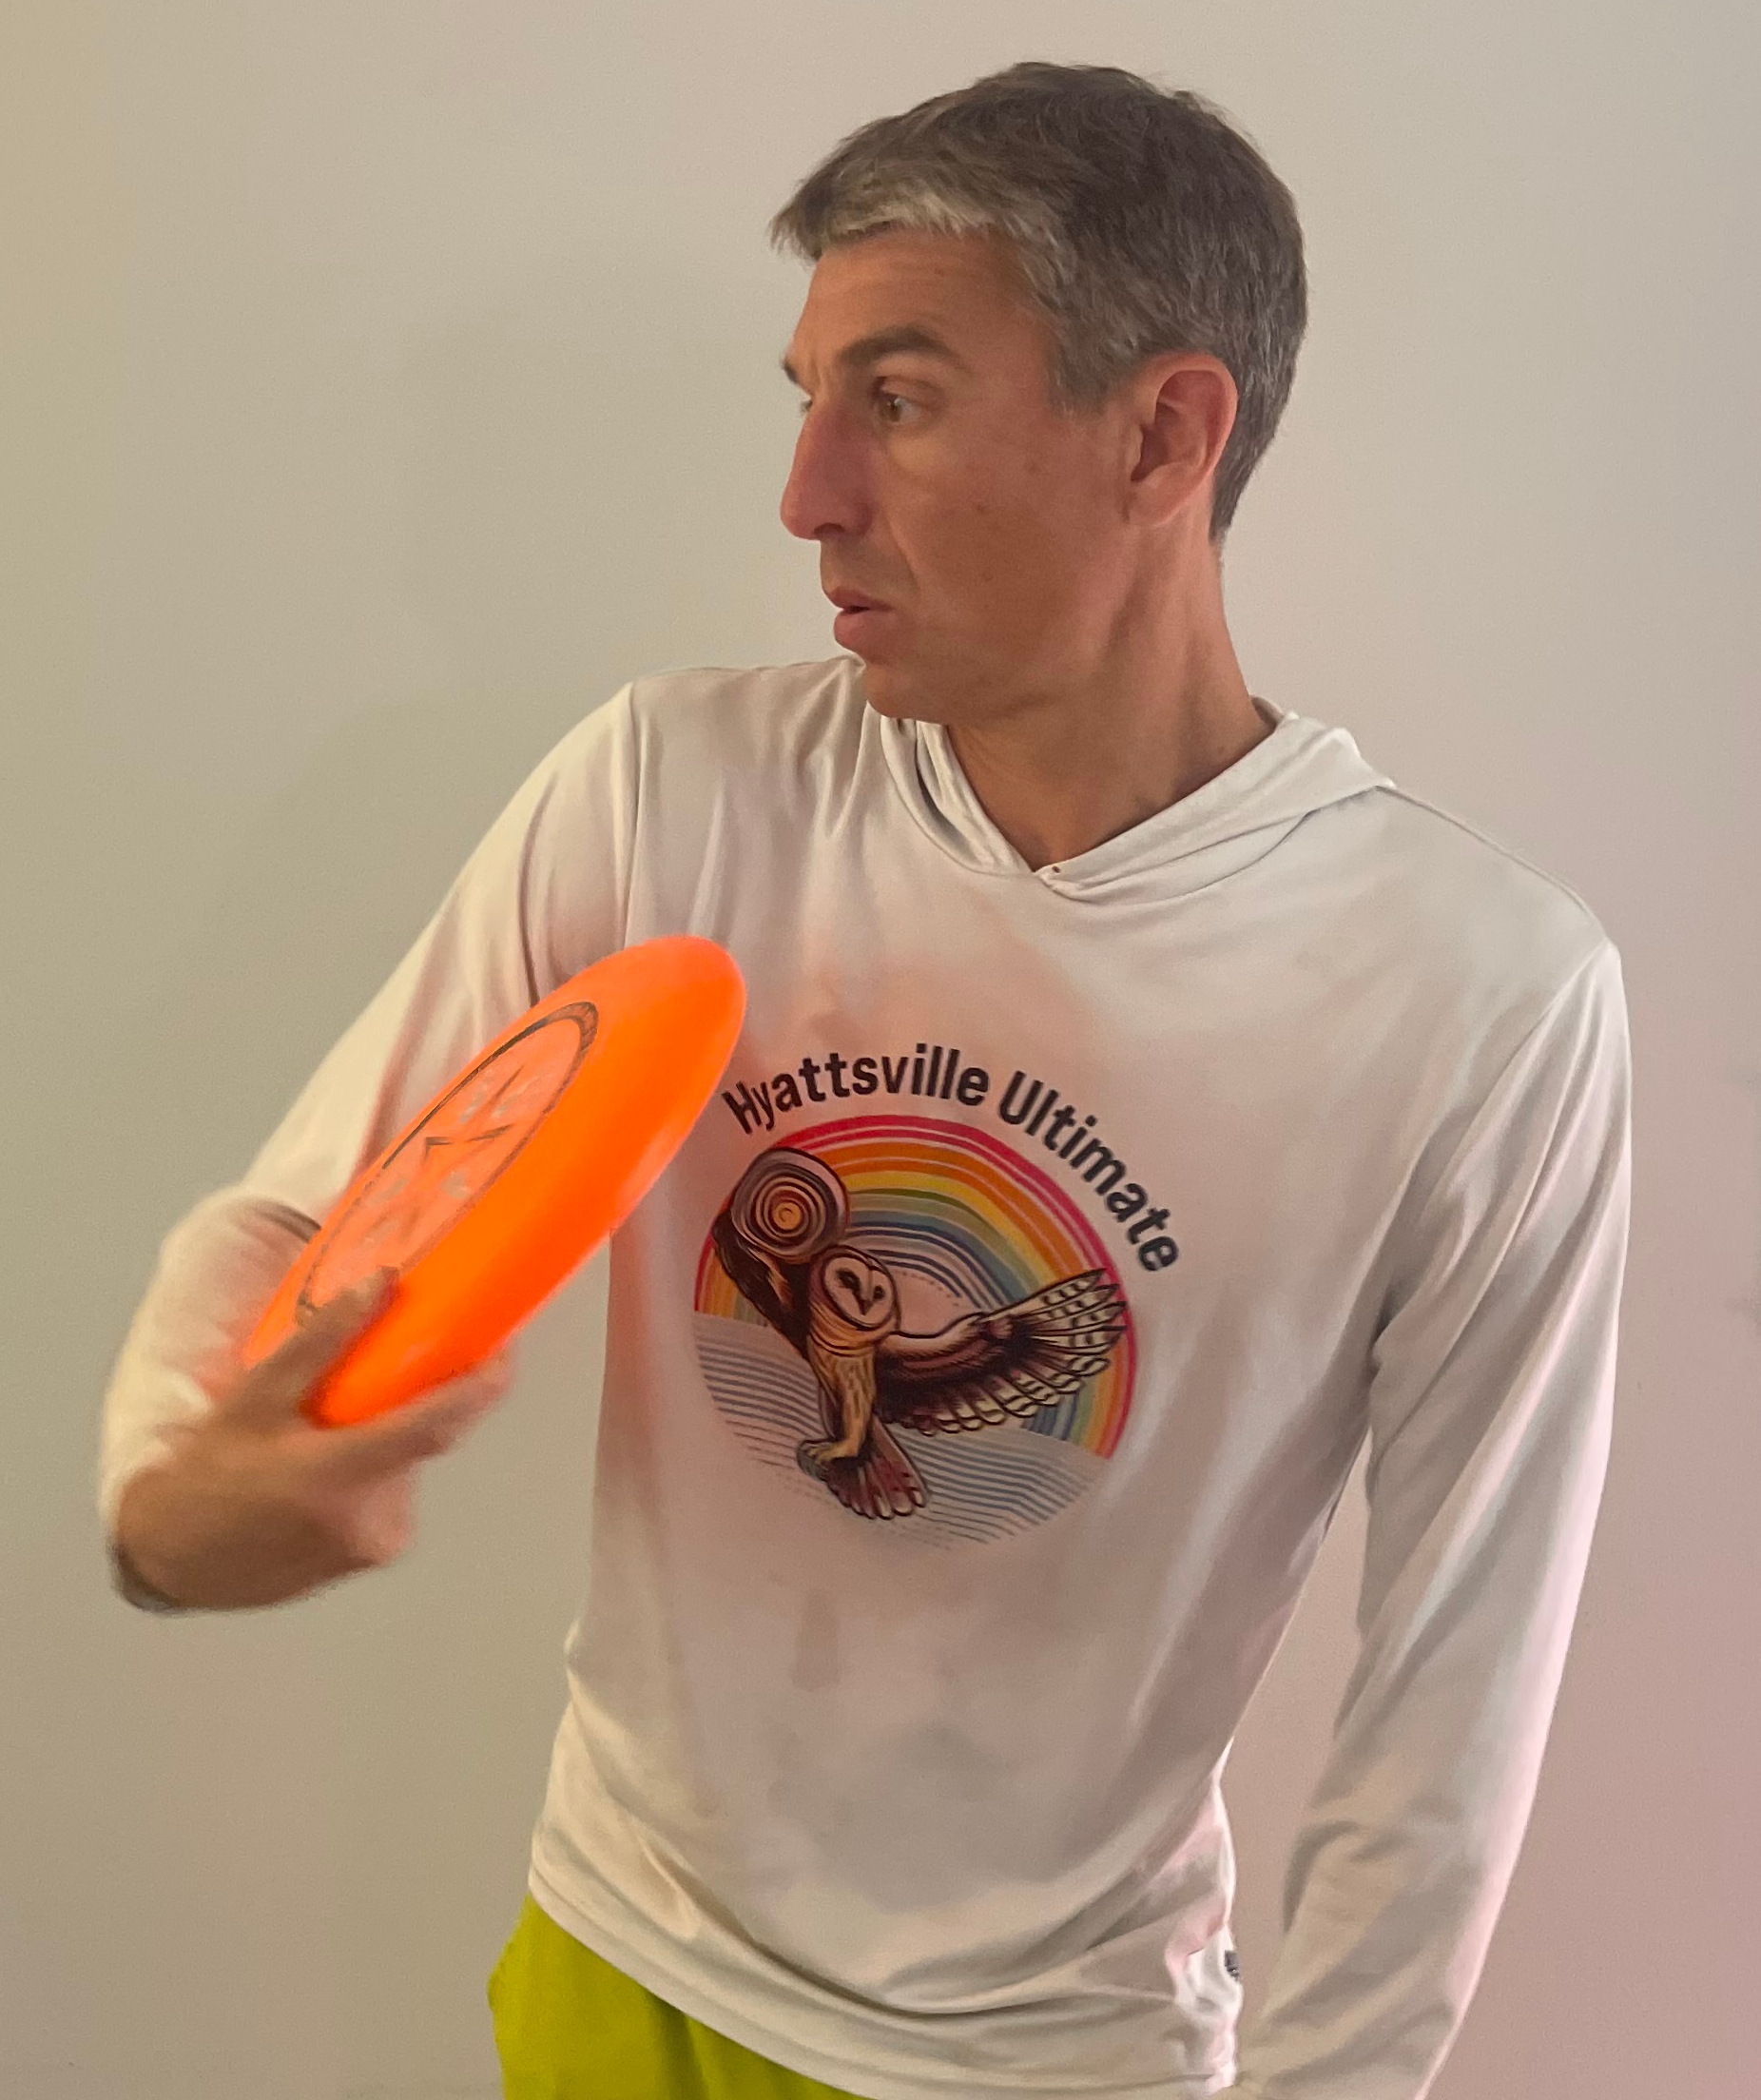
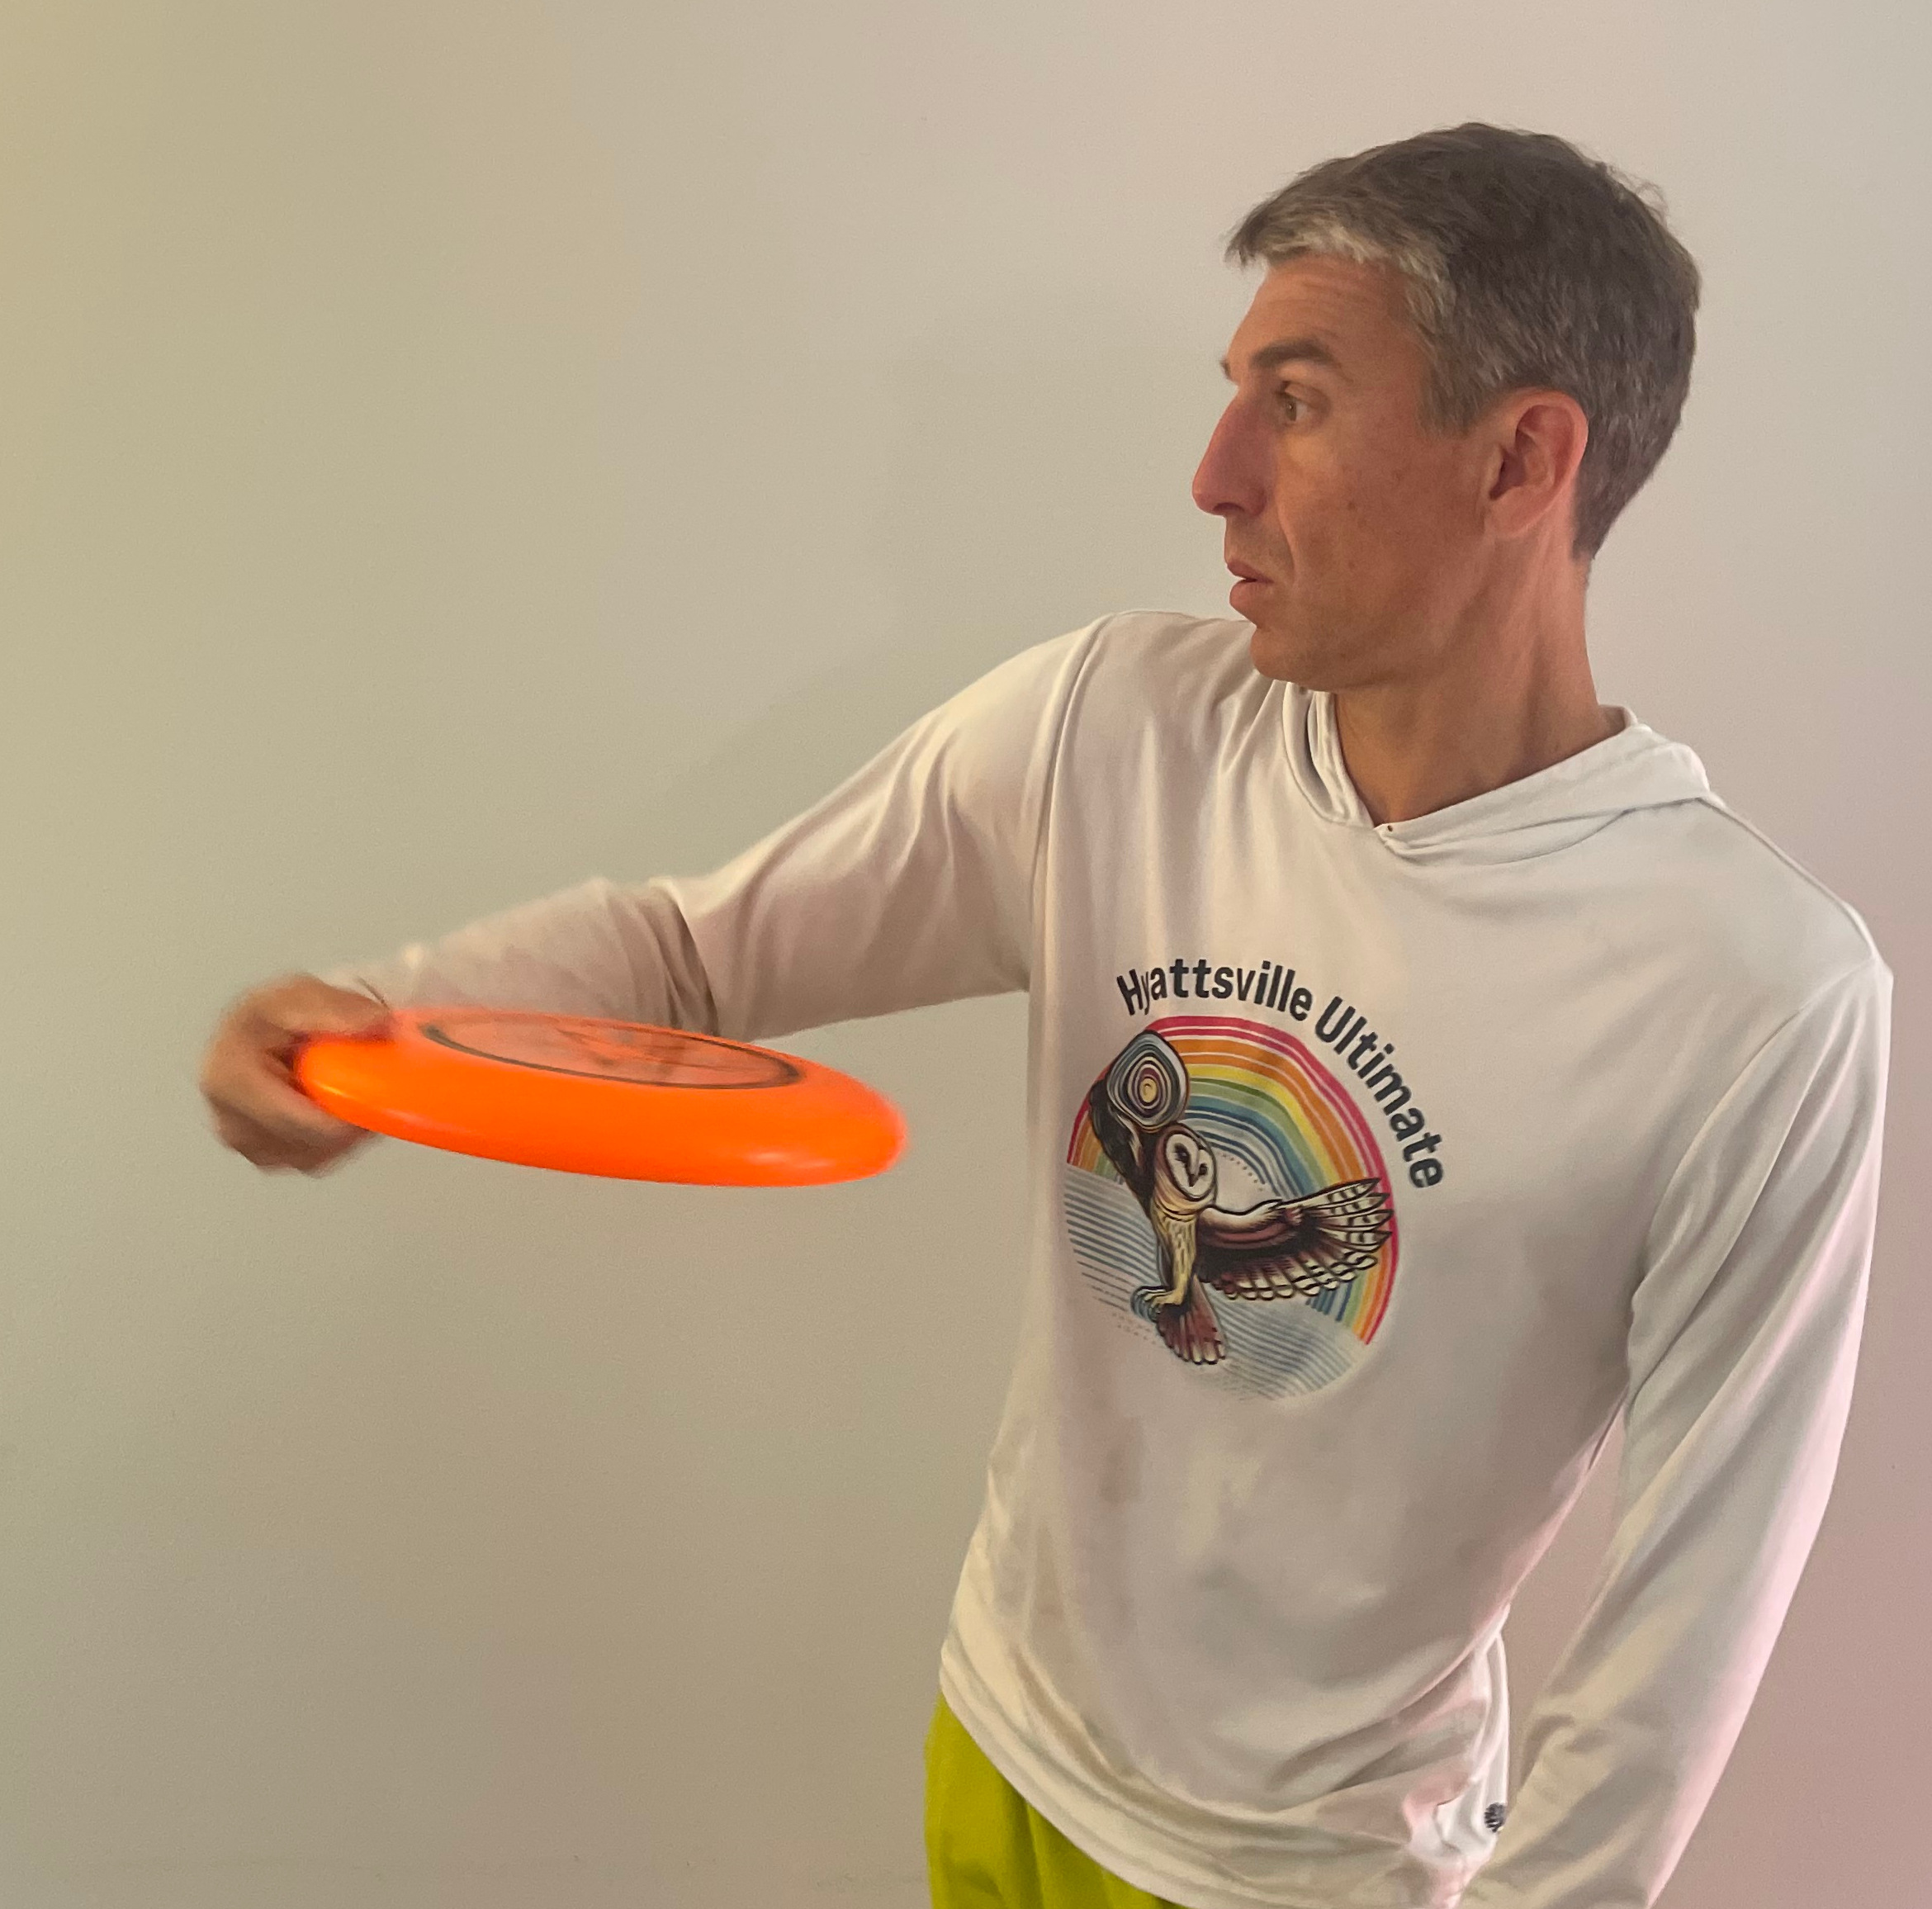
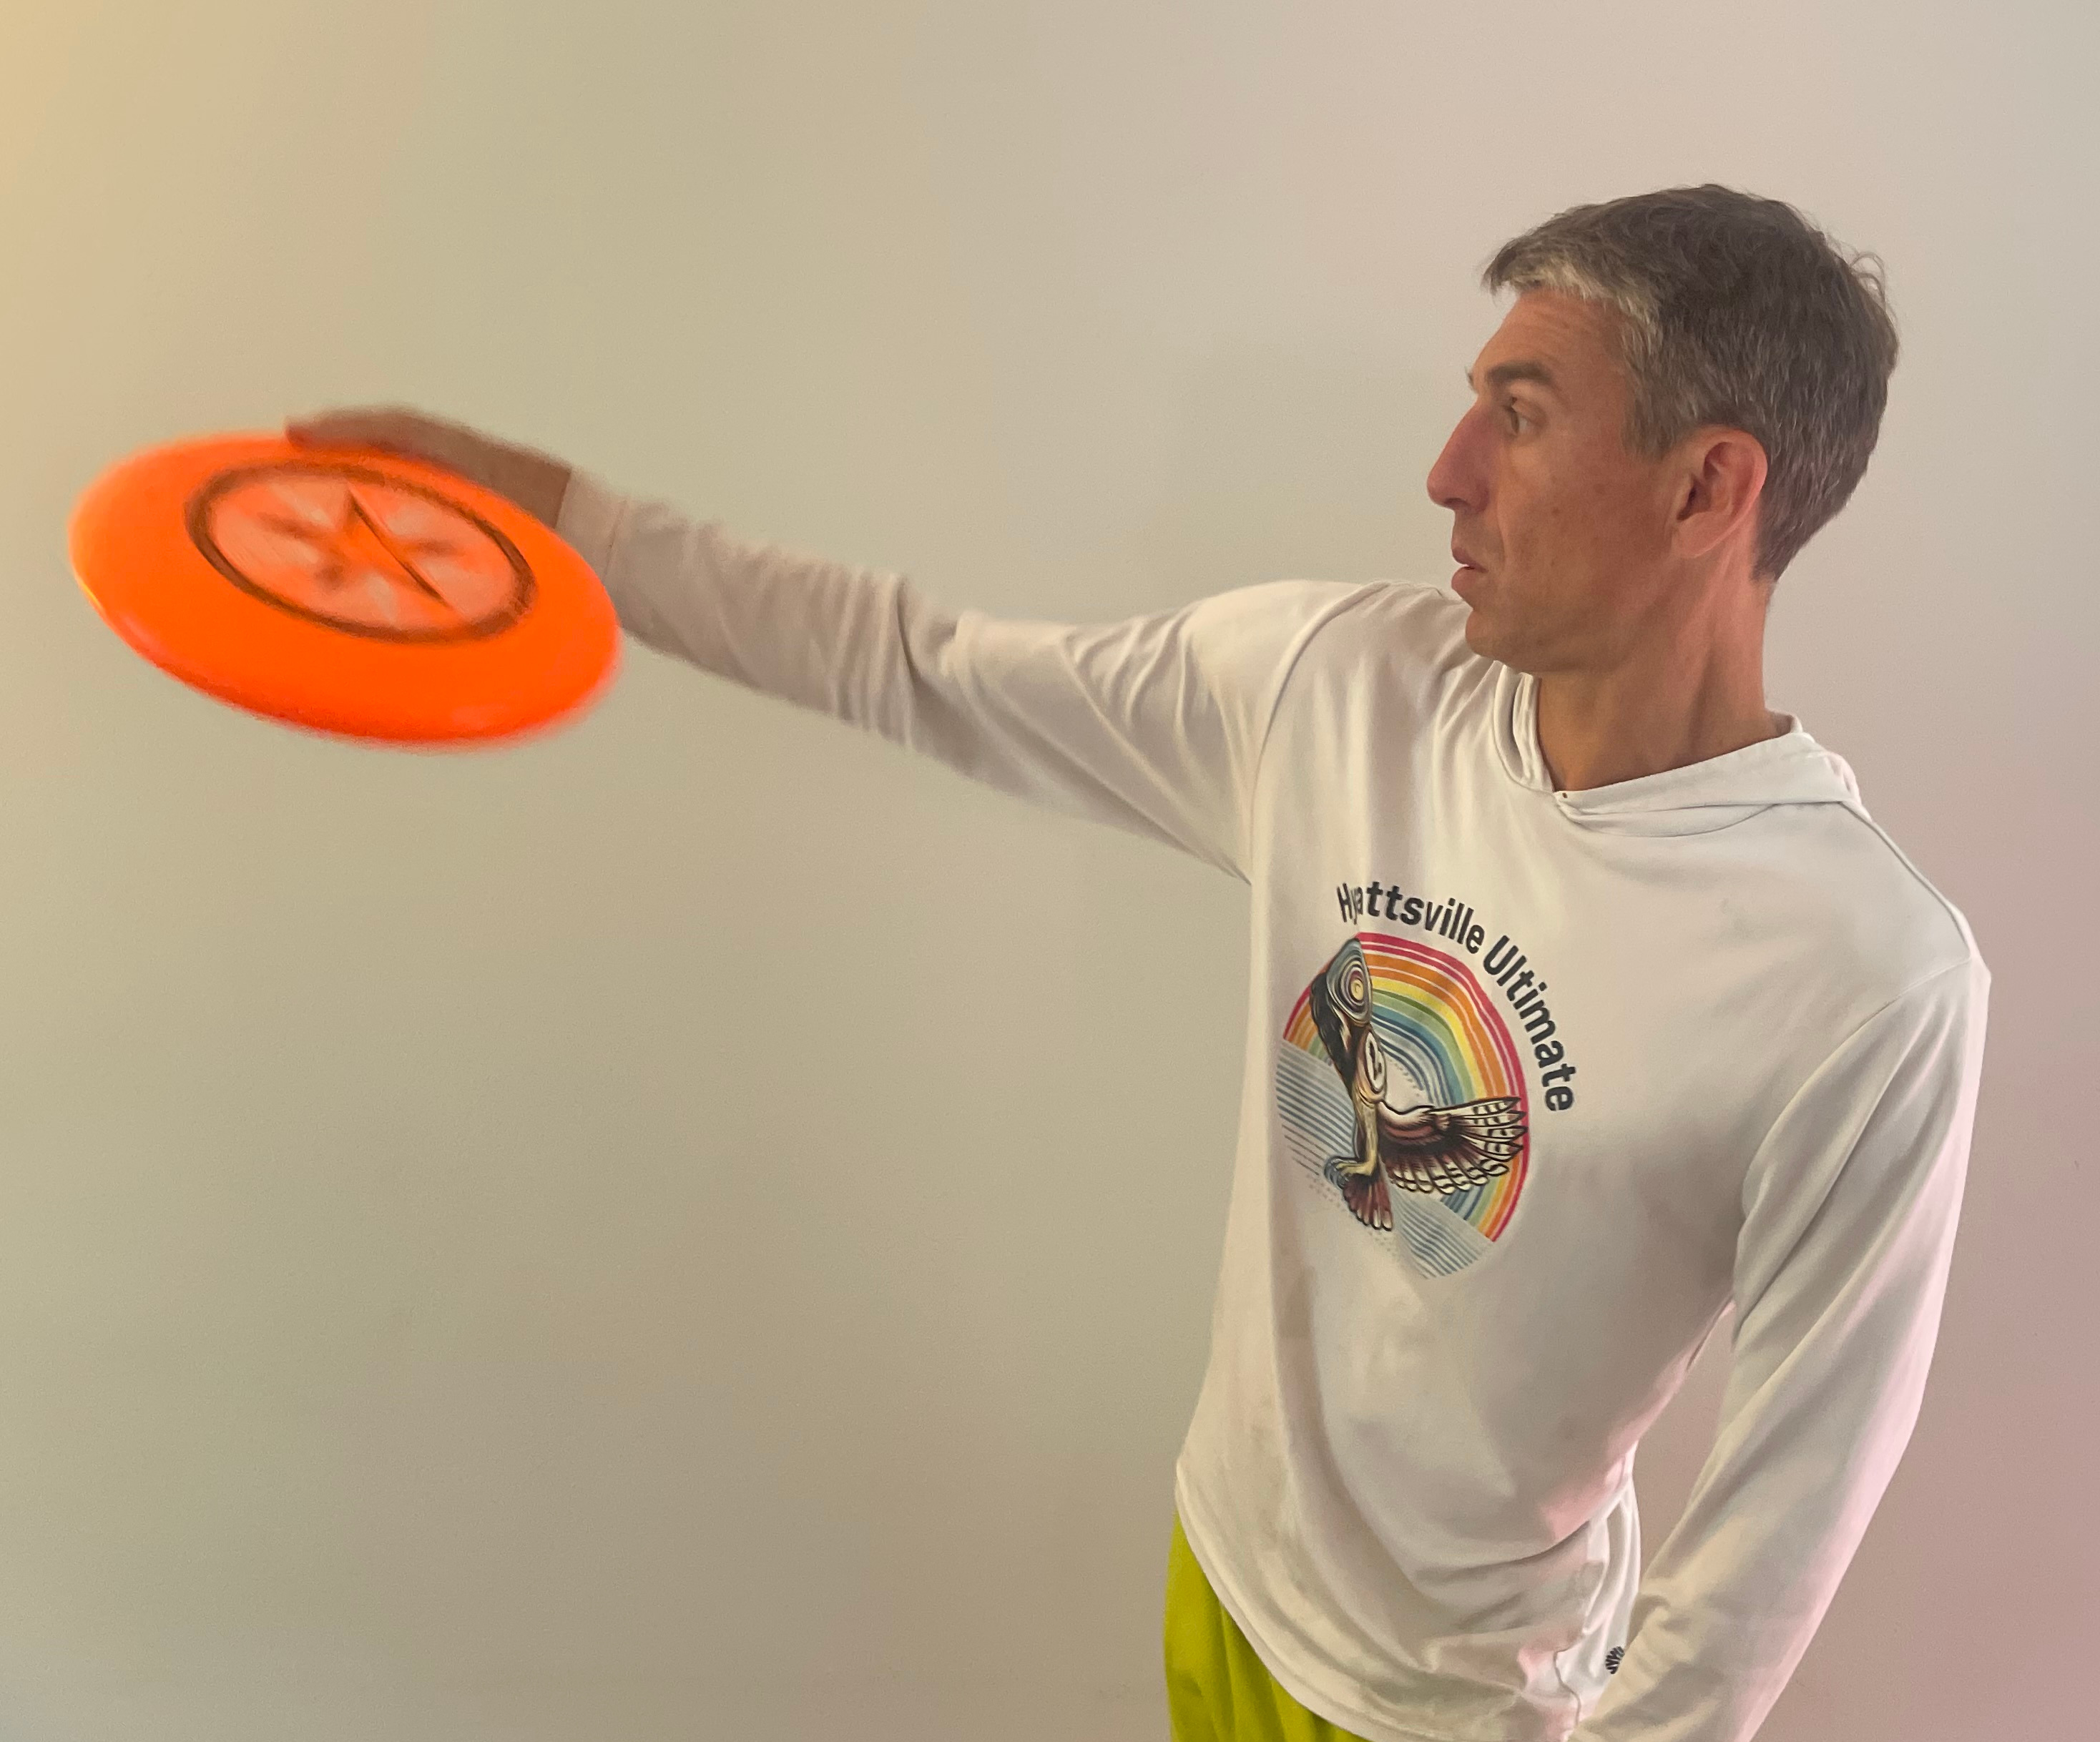
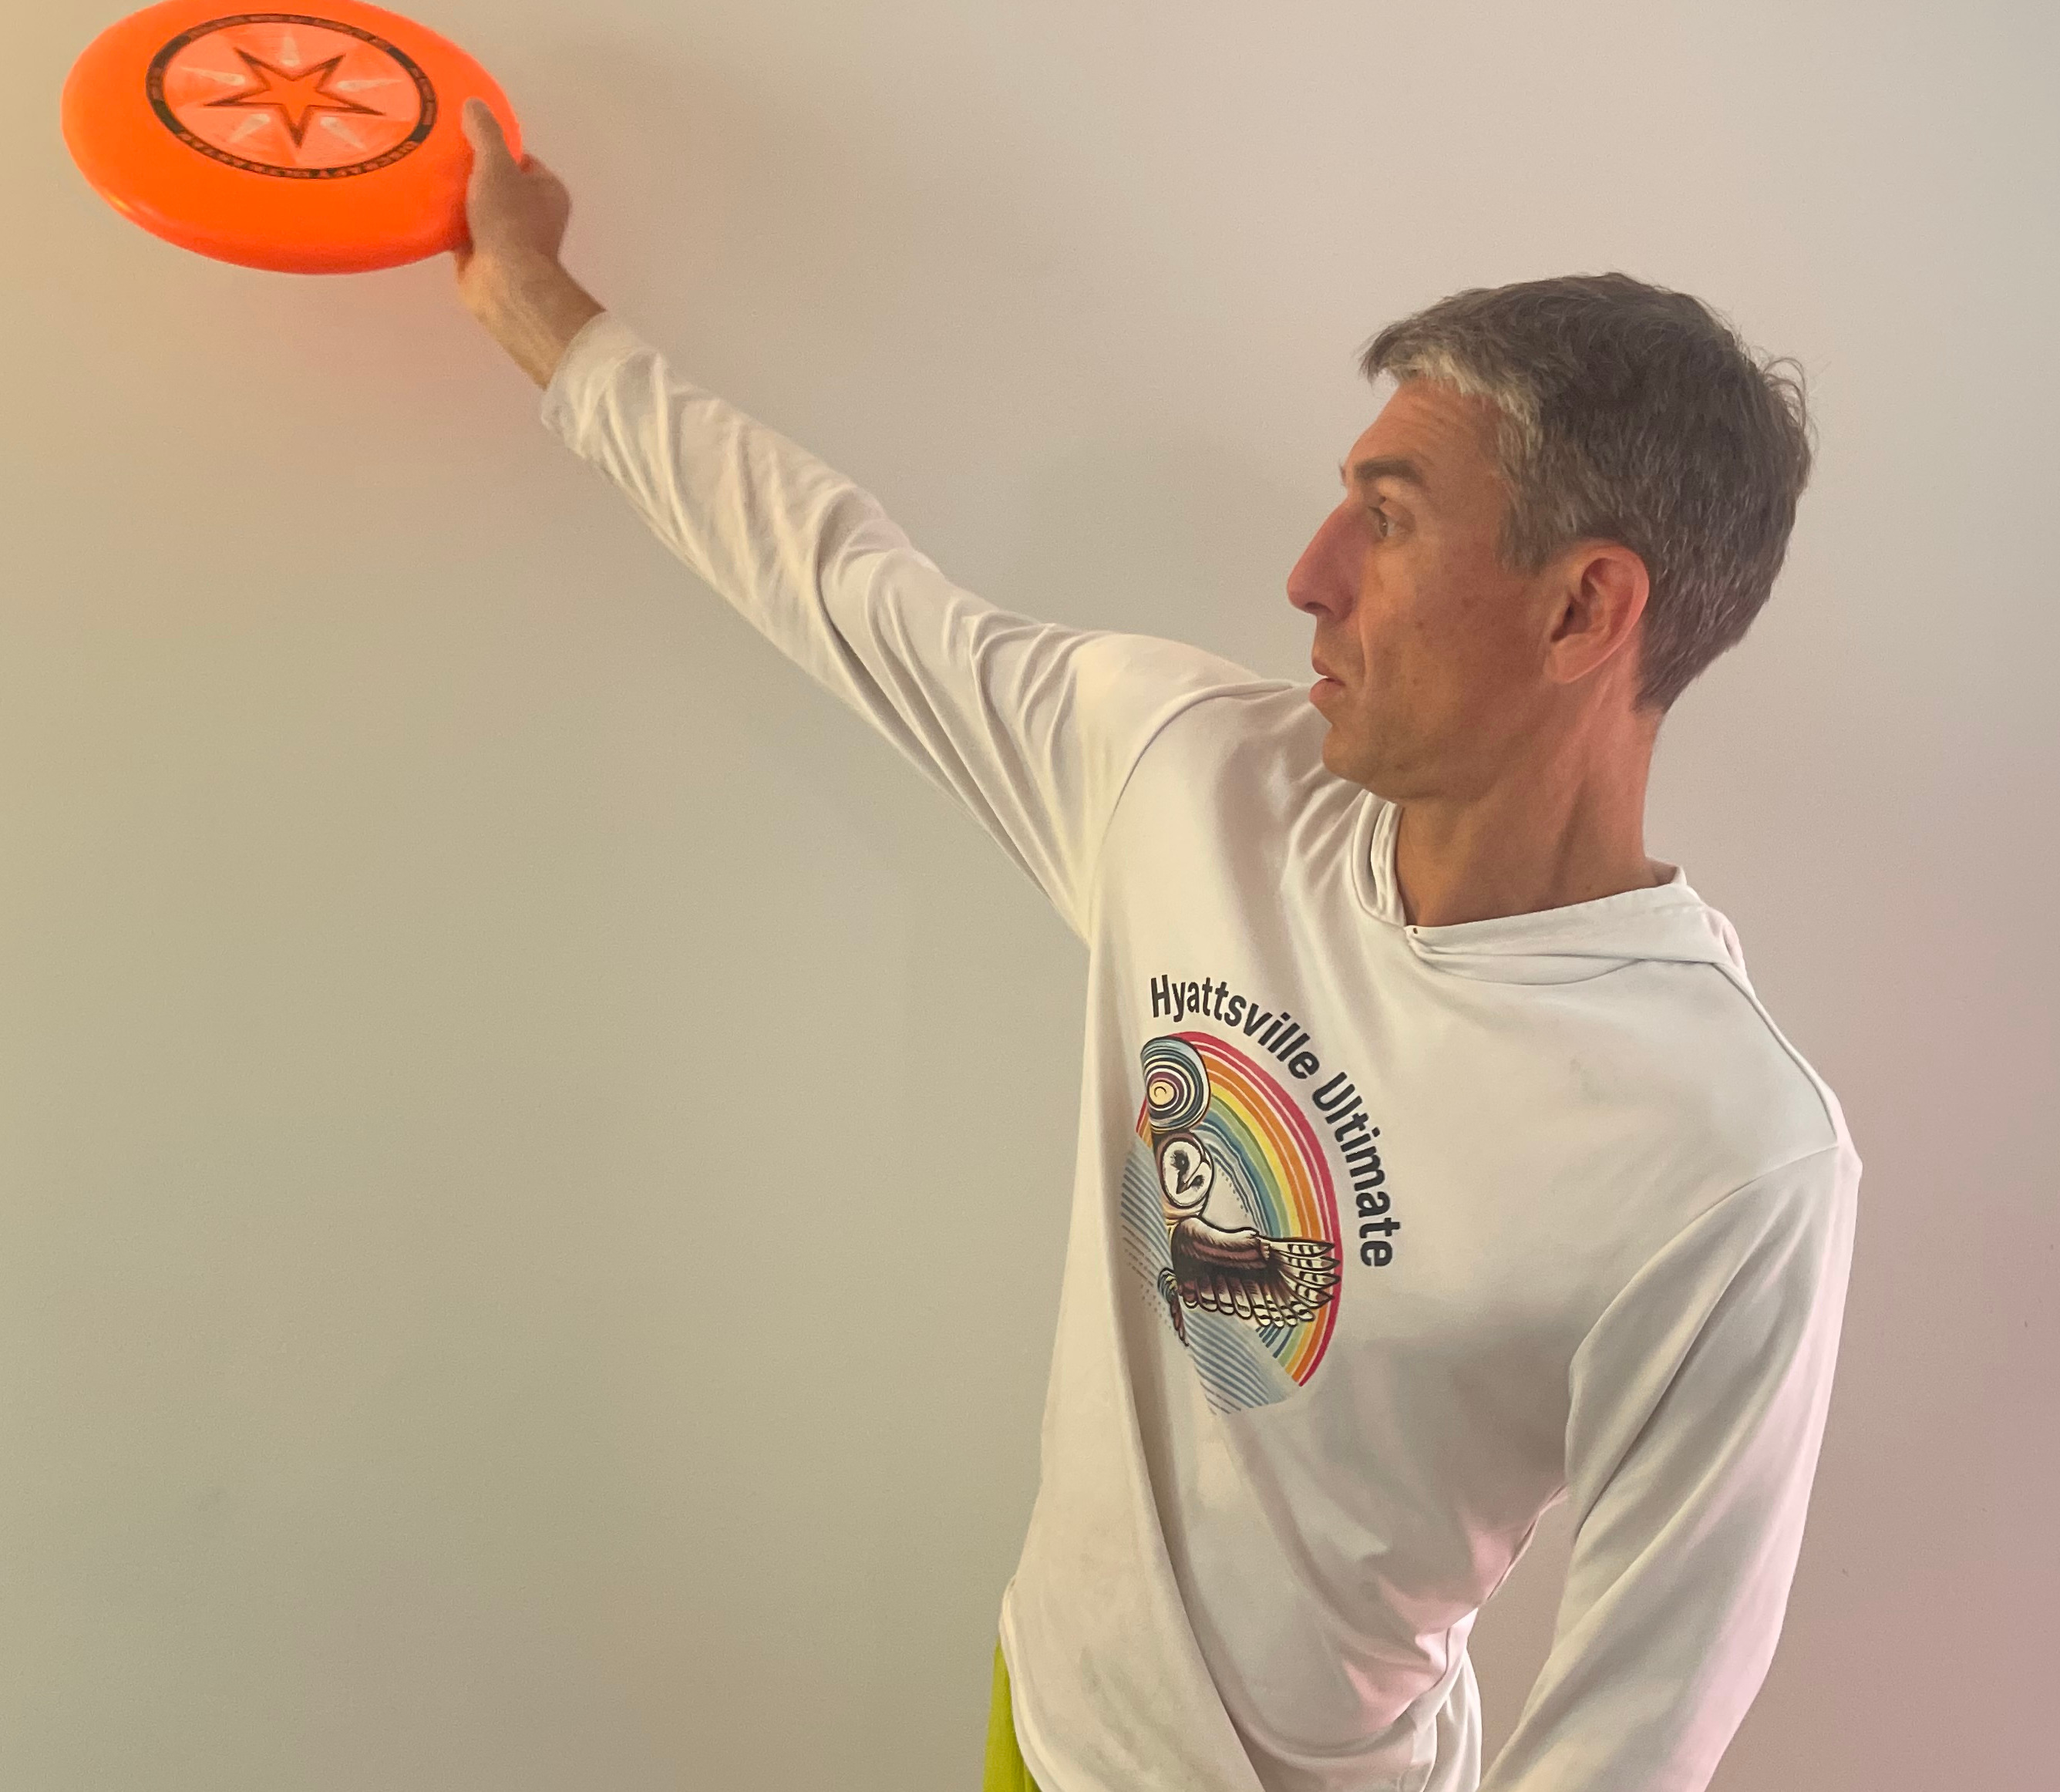
That is the backhand. Six steps. Grip, stance, coil, uncoil, release, follow through. Simple to describe. A lifetime to master.
Where the Power Lives
You might be wondering: how do I throw it farther? How do I get from 20 yards to 40 to 60 to 80?
The answer is not "throw harder with your arm." That is the most common mistake beginners make. They think more arm speed equals more distance. It does not. More arm speed without the rest of the chain just produces faster wobble.
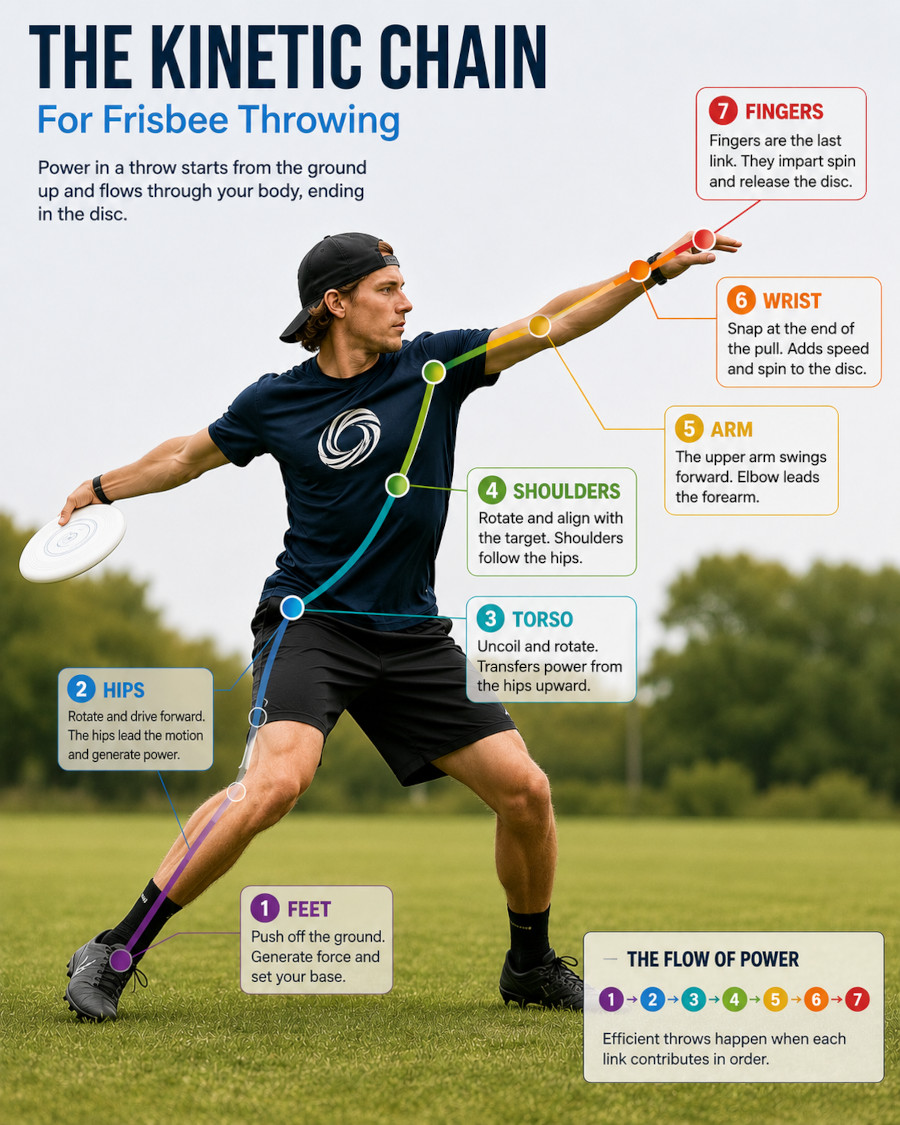
Real power comes from the chain. The kinetic chain. And the chain starts at the ground.
Your feet. If you want to throw farther, take a few steps toward your target before you release. That forward momentum adds power to everything above it. On a big pull or a disc golf drive, you might take three or four running steps before you plant and throw. That running energy transfers up through your legs and into the rotation.
Your hips. Your hips are the engine of the backhand. The twist of your hips generates more power than your arm ever could. Think about a baseball pitcher. The arm is important, but the real velocity comes from the hip rotation that drives the arm forward. Same principle. Twist your hips back in the coil, drive them forward in the uncoil, and let everything above them follow.
Your core. The muscles in your abdomen and lower back are what connect your hips to your upper body. The stronger your core, the more efficiently you transfer rotational power from your hips through your torso to your arm. Do sit ups. Do planks. Do anything that strengthens your core. Your abs are the engine of rotational power.
Your wrist. The wrist is the final multiplier. Everything the body built up, from the feet through the hips through the core through the arm, gets released through the wrist snap. The wrist is where spin is born. And spin is what makes the disc fly far and fly straight.
The full kinetic chain, in order: feet → hips → core → torso → shoulder → arm → elbow → wrist → fingers → follow through. Each link accelerates the next. Miss a link and you lose power. Connect them all and the disc launches like it has a motor.
There is also an expert level technique that you should try once you are comfortable with the basic motion. The 360 degree spin. You pivot on one foot and rotate your entire body in a full circle before releasing. All of that rotational energy gets loaded into the throw. It looks dramatic, it feels powerful, and it can add significant distance. It feels weird the first few times, but after 10 or 20 attempts, your body figures out the timing. We will cover this in much more detail in the pull chapters, but start experimenting with it now.
Release Angles: IO and OI
Once you can throw the disc with solid spin and reasonable accuracy at your target, it is time to learn the two angles that will open up your entire throwing game.
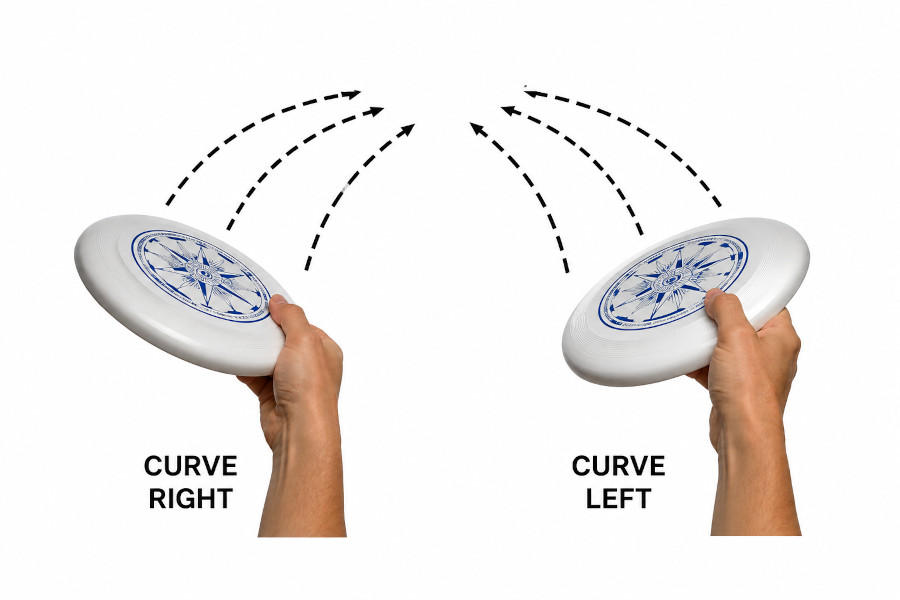
You MUST understand these. They are used constantly on the Ultimate field and in the language of the sport. When someone at pickup says "throw it IO," you need to know instantly what that means. These are not advanced concepts. They are fundamental vocabulary.
Inside Out (IO): The disc tilts away from your body on release. The outside edge is angled slightly upward. As it flies, it curves back toward the middle. The IO backhand is the most common angle for throws around a mark, and it is the foundation of a good pull. You can usually get more power on an IO throw because the angle lets you engage your body more fully.
Outside In (OI): The disc tilts toward your body on release. The inside edge is angled slightly upward. As it flies, it fades away from you. The OI backhand is trickier and more situational, but it is valuable in certain game situations where you need the disc to curve in a specific direction.
Here is how to practice both. Throw 10 backhands at your target focusing on tilting the outside edge up on release. Watch how the disc curves. Then throw 10 more focusing on tilting the inside edge up. Feel how your body position changes to create each angle. Then try both with your non dominant hand.
The IO angle is especially important for pulls and for throws around the mark. Master it first. Then add the OI to your toolkit.
The Backhand Family
The backhand is not just one throw. It is a family of throws, each with its own personality and purpose. Think of them like different clubs in a golfer's bag. You would not use a driver on the putting green, and you would not use a putter off the tee. The right throw for the right situation is what separates a thrower from a player.
Short Passes (Resets and Dumps). Short backhands are all about touch. No windup needed. Just a quick flick of the wrist with enough spin to get the disc there flat and catchable. These are for resetting the disc back to a handler behind you or dumping it when the stall count is climbing. Distance: 5 to 15 feet. Power: minimal. Control: maximum.
Medium Passes (To Cutters in Space). Your bread and butter during gameplay. 20 to 40 feet. Enough power to get it there with pace, but not so hard that it is uncatchable. Lead your receiver so they can run onto it. This is where the IO and OI angles become really important, because you are often throwing over or around a defender to find your cutter in space.
Long Passes (Hucks). The full body coil. Steps into the throw. Hip rotation. Torso twist. Full arm extension and follow through. This is where you launch it 50, 60, 70 yards downfield. These opportunities usually happen when you pick up the disc, see someone streaking long, and do not have a mark in front of you. Or when you fake successfully and create a window. The huck is the backhand at its most powerful and its most thrilling.
The High Release Backhand. Instead of releasing at hip level, you release above your shoulder, sometimes above your head. This lets you throw over people. Over the mark. Over defenders in the lane. The key is that a high release backhand needs to drop softly. You want it to float down gently so someone can run onto it. It is not a bullet. It is a touch throw from a high release point. Mastering the high release backhand is one of the things that separates good handlers from great ones.
The Dad Throw. I love this name. It is called the Dad Throw because older players tend to use it instead of a flick. Here is how it works: instead of winding up on your non dominant side where you can twist your torso, you bring the disc out on your dominant side and throw it backhand with just your wrist, elbow, and arm. No torso twisting. You put the disc on your dominant side and put your body between you and the defender.
The Dad Throw is super important for short, accurate, softer throws that people can run onto. It releases incredibly fast. It is good for faking. And it is easy to put a lot of angle on it. I see this throw used a lot by players who are not yet comfortable with the flick, and honestly, it is a perfectly viable alternative for close range situations. The timing of the Dad Throw makes it very valuable in game situations, especially when it is windy.
The Air Bounce. This is the coolest looking throw you can do, and you might as well learn it.
The air bounce is a backhand where you push down with your thumb as you snap and release. You are almost pushing the disc downward while you uncoil it. The disc dips down, and then the back edge scoops along the air, and it bounces back up. It looks like the disc hits an invisible ramp. Like magic.
The air bounce is incredibly useful for breaking the mark because you throw it underneath their hands. They are expecting throws to come at them horizontally or above. They are not expecting one to dip down and then rise up underneath their guard.
Here is the secret benefit that I discovered: if you can learn the air bounce, throwing a flat backhand becomes ridiculously easy. Almost unfairly easy. Because you develop such fine control over your release angle and thumb pressure that a normal flat throw feels simple by comparison. The air bounce is the hardest version, and everything else becomes easier once you have it.
Common Backhand Mistakes
Before we move on to the flick, let me save you some frustration by pointing out the most common mistakes I see, and the ones I have made myself more times than I care to admit.
※ Throwing it like a ball. This is the biggest one. New players throw the disc the way they would throw a ball, with no thought about spin, and it comes out like a knuckleball: wobbling, stalling, going nowhere. Here is the funny part though. If you threw it like a sidearm baseball pitch, or released it like a basketball free throw rolling off your fingers, you would actually be close, because those motions create lots of spin. The disc is not a ball you push through the air. It is a spinning wing. Spin first, power second.
※ Facing your target square on. People stand facing forward, throw with just their forearm, and wonder why the disc pops straight up in front of them. The backhand starts sideways. Turn your body, stand side on to your target, and let your whole arm swing across and fully release toward where you want the disc to go. Do not hold anything back on the launch.
※ Aiming up to make it go up. This one feels logical and is completely wrong. Players tilt the disc upward because they want it to fly far and high, and instead it climbs, stalls, and dies. Keep the disc level through your release. A flat, level, spinning disc carries itself. Save the angles for later, after you can control the power.
※ Gripping too tight the entire time. A death grip from start to finish tenses your forearm, kills the natural whip of your release, and delays it. Remember: loose to firm to release. Let the grip breathe.
※ Not enough spin, because you cannot coil. When someone just cannot get spin on the disc, the limit is almost never their hand. It is how far they can coil up: wrist, arm, shoulders, torso, the full body winding and unwinding. Watch a player who struggles and you can usually see the exact spot where their coil stops short. If that is you, the fix is not more throwing power. It is flexibility and strength: stretching, yoga moves, and practicing the coil and uncoil motion over and over without even releasing the disc. Most people never practice with a disc by themselves. They just expect it to work. Develop the movement through flexibility and reps, and the spin will come.
※ No follow through. Stopping your arm at the release point is like slamming the brakes in the middle of a golf swing. The energy has nowhere to go. Let your arm continue its arc naturally. The follow through is not optional. It is part of the throw.
PART 2: THE FLICK (FOREHAND)
From Your Back to the Field
If you have been doing the drills in this book, you have already been throwing the flick for chapters now. You just might not have realized it.
The Gravity Flick in Chapter 5? You were lying on your back, pushing the disc upward with your fingers and wrist. That push, that snap, that moment when the disc spins off your fingertips and rises against gravity? That is the flick. The exact same motion. The exact same muscles. The exact same finger push and wrist snap.
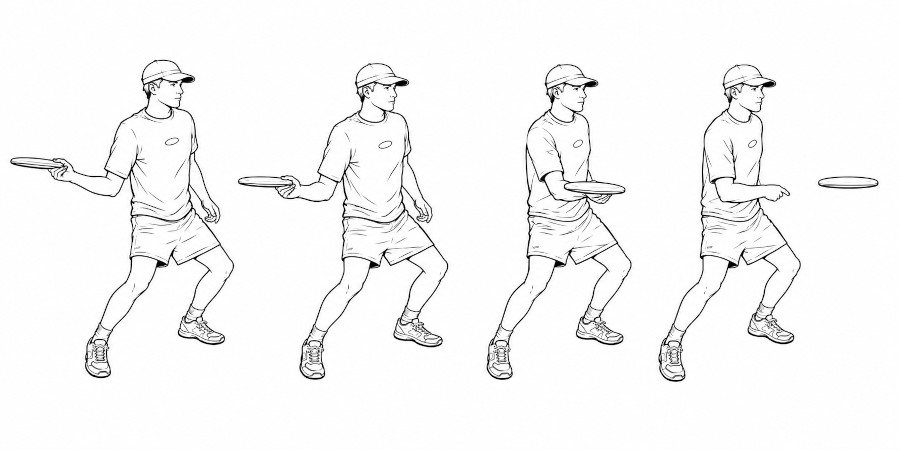
The only difference now is direction. On your back, you threw vertically. Standing at your target, you throw horizontally. The motion is the same. The energy transfer is the same. You are just redirecting it sideways instead of upward.
If that realization makes you feel more confident, good. It should. You have been preparing for this chapter since Chapter 5. Your fingers are strong from the Hula Hoop. Your wrist snap is developed from the Gravity Flick. Your webbing release is trained from the Eagle Slash. You are more ready than you think.
The Flick Is a Journey, Not a Moment
I have been working on my flick for over 20 years. And for the past year, I have worked on my left handed flick just as much as my right. Both keep progressing, both keep getting better, and here is the honest truth about how: there was no one thing that made it happen. No single tip, no single night, no magic moment where it all clicked. I want to tell you that up front, because sports stories love the lightning bolt version, and that is just not how throws are built.
There were milestones, though. One of them came at the Hyattsville pickup game on a humid Saturday afternoon, throwing with David Lingua, one of the better handlers in our group. "Just let it rip," he told me. "Stop trying to control it. Cock your elbow back and unleash it." So I did, and I threw a wild inside out flick maybe 40 yards. Way off target, but eye opening. That night helped me understand that my limits with my dominant hand were stronger than I thought. But understanding it was only the start. I still had to practice that big motion over and over and over to get the release point just right.
And what I have learned over all those years is that the improvement came from everywhere at once. The Hula Hoop Drill strengthened my fingers. The flexibility work loosened my wrist and shoulder. Thousands of practice flicks taught my whole right side to fire together. My hand, my arm, my hips, everything got stronger and more connected, until I could feel what I call nailing the kinetic chain. The wrist snap matters, but it is literally just one part, although very important. It all has to work together. And the technique that finally emerged is unique to me and my muscles, which is exactly what will happen for you. Your flick will not look exactly like mine. It will look like yours. Your body movements put together.
A friend of mine, great handler, told me the flick is a violent throw, because you just unleash it with such force and explosion when compared to the backhand that it can feel like a violent rageful launch of your arm and body.
My left hand taught me the other half of the lesson. Reps help a lot, but reps alone are not the whole answer, because my left hand simply is not as strong, as flexible, or as trained as my right. I cannot write with my left hand. I cannot chop vegetables for dinner with it. It has none of the muscle memory my right hand has spent a lifetime building. So I could not just throw harder with it, the way David taught me to do with my right. There is a limit to how hard my left hand can throw, because the strength is not there yet. Instead, I have purposely built it up: the lying on your back drills, the Hula Hoop Drill, daily reps with that hand. Over the past 12 months my left handed abilities have increased significantly. But it took strength work AND flexibility AND reps AND patience, all together.
So that is the journey I want you to expect. Not one breakthrough, but a slow stacking of many small gains from many directions. Trust the process, find the technique that fits your body, and keep throwing. The reps are doing their work even on the days you cannot feel it. Commit to it and make the forehand flick a main weapon in your bag!
Why the Flick Is Harder Than the Backhand
Let me validate something for you right now: if you are struggling with the flick, you are not alone. You are not doing anything wrong. The flick is genuinely, objectively harder than the backhand. And there is a specific reason why.
Your body is simply not trained for this motion. With the backhand, your wrist curls from inside to outside. You do that motion all the time. Turning a doorknob. Throwing a ball. Swinging a tennis racket. A hundred daily movements prepare your body for the backhand without you ever touching a disc.
The flick is the opposite direction. Outside to inside. Your wrist cocks back and then snaps forward. Very few things in normal life train that movement. Tennis players who hit topspin backhands know it. Baseball pitchers who throw sidearm know it. But for most people, it is a completely foreign motion. Your muscles have never done it. Your tendons have never stretched that way. Your brain has never sent those signals in that sequence.
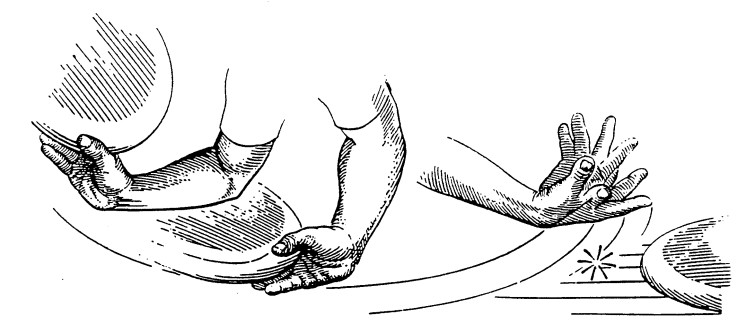
That is why the flick feels so awkward at first. It is not a technique problem. It is an infrastructure problem. Your body literally does not have the physical pathways built yet. And building them takes time and reps. A lot of reps.
Here is something that should give you perspective and hope at the same time. Ben Jagt, a two time AUDL MVP, one of the best players in professional Ultimate, told me this: "Relative to the rest of my ultimate skill, forehands are definitely my weakest point. Frankly I'm still pretty bad at throwing forehands. It hasn't progressed a ton but I've just worked and worked and worked."
A two time MVP. Still working on his flick. If that does not make you feel better about your own journey, nothing will. The flick is hard for everyone. The difference between the players who get good at it and the players who don't is not talent. It is persistence.
And remember the skipping rocks connection from Chapter 5. If you have ever skipped a stone across water, you have already done the flick motion. That sidearm whipping snap with your wrist? That is it. The flick is just a bigger, more controlled version of skipping a rock. If your body knows how to skip stones, it already has a head start on the flick.
If you want to improve your flick, go throw a hundred rocks skipping as far and fast as you can. Use some heavier rocks too to build muscle!
Finding Your Flick Grip
The flick grip matters even more than the backhand grip, because the disc is being driven by fewer fingers and the margin for error is smaller. Khalif El-Salaam, who has thrown more flicks in competition than almost anyone alive, taught me a grip progression that I now teach to everyone.
Start with the split finger grip. Spread your index and middle finger apart like a peace sign. Your index finger extends along the rim, acting like a table that keeps the disc flat. Your middle finger presses against the inside of the rim, providing the spin. Thumb on top.
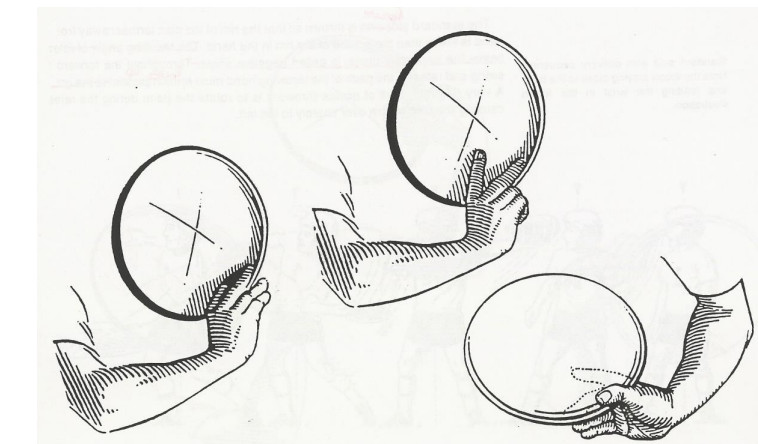
The split finger grip is the most forgiving grip for beginners. That index finger on the rim acts as a stabilizer, like training wheels on a bicycle. If you are struggling to keep the disc flat, if it keeps flopping down or tilting on release, the split finger grip will help because the index finger is physically holding it level.
Progress to the closed finger grip. Once your motion is solid, once your wrist snap is consistent and your throws are not wobbling, try bringing your index and middle finger together on the inside of the rim. Both fingers now drive the spin. You lose the table stabilizer of the index finger, but you gain more power and a tighter grip.
Khalif's advice on the transition: "Once they learn the motion of their elbow, once they get their shoulder good, once they get their form good, then it's like, okay, I want you to close your fingers and see if you can get more distance on it."
My personal grip. I actually use three fingers. My index finger acts as an undersupport on the middle of the disc, and my middle finger and ring finger are the main drivers of the spin in the crack of the rim. A lot of people tell me I am crazy for doing this. They say I will not get as much power. But I can aim it better this way. Find what works for you.
3 Finger grip.Place all three primary fingers under the disc together with no stabilizer (like how I do it), squeeze the fingers together (like they are 2 fingers) and rip the disc this way.
Like the backhand, the grip pressure changes throughout the throw. Start loose. Push the disc with your other hand down into your thumb and palm area, securing it in that U shape between your thumb and fingers. As you cock your wrist back, the grip should be snug but not tight. Just before release, grip hard so the disc does not fly out early. Then let go.
That loose to tight to release sequence is critical. If you grip too tight the whole time, the disc sticks in your hand too long. If too loose, it flies out early and wobbles.
The Snap: Pent Up Power in the Webbing
Different players have different grips. Different stances. Different arm angles. Different footwork. Harper Garvey, a handler for the New York Empire, told me: "There are all sorts of grips, footwork and form combinations that work for different people. You can pretty much name a quirk and I could name a good thrower that makes it work."
But there is one thing that does not vary. Every good flick thrower generates a violent burst of spin at the moment of release. Coaches usually call it the wrist snap, and the wrist is part of it. But after twenty years of throwing, I want to teach it to you the way I actually feel it, because for me the spin does not come from turning the wrist. It comes from the fingers.
Here is what is really happening. Your fingers press hard up against the inside rim of the disc, and your thumb presses down from the top, pinching the disc into the webbing between them. That webbing pressure locks the disc in place. Now your fingers are pushing with real force, but the disc cannot go anywhere yet. That is pent up power, loaded and waiting like a compressed spring.
Then you release. The disc finally lets go out of the webbing, and all that stored finger pressure fires at once, pushing down and through the rim. That push is what spins the disc. Think of spinning a basketball off your fingertips, or the exact way your fingers roll a flat stone as you skip it across water. The object rotates because your fingers push through one edge of it as it leaves. The disc is no different. Fingers pushing hard, webbing holding tight, then a sudden release: that is the snap.
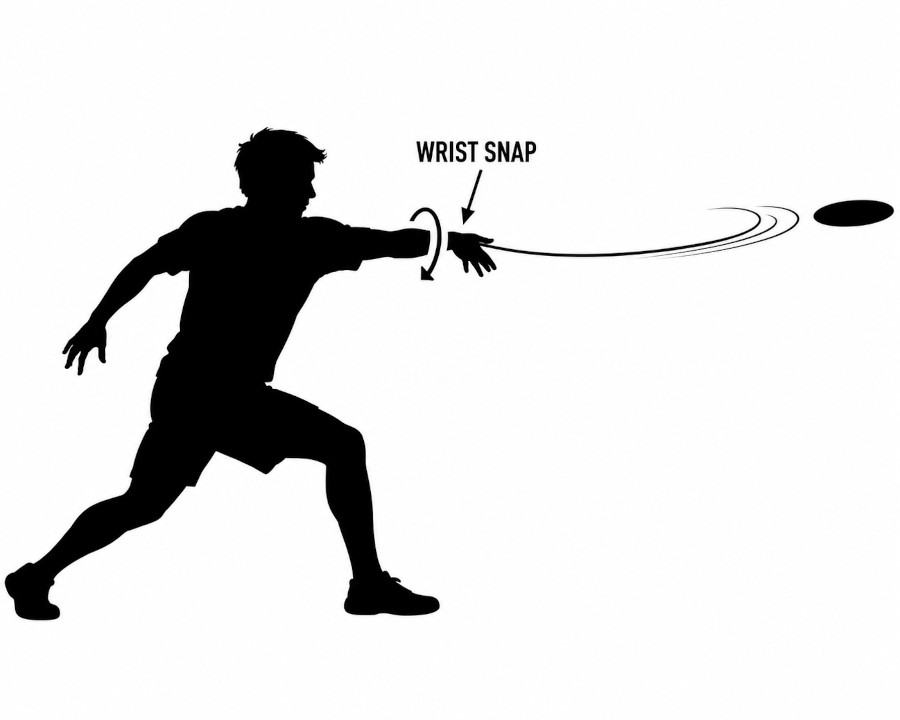
The whip image still helps, as long as you know where the whip ends. The power does not come from your shoulder or your bicep. Your hips, torso, shoulder, and arm are the handle: they create the wave of energy that travels outward. Your wrist carries that wave the last few inches. But the tip of the whip, the part that actually cracks, is your fingers pushing through the webbing. Elbow leads, arm follows, wrist carries, fingers fire. Get it in that order and the disc launches with spin. Get it out of order and the disc wobbles.
And you have already been training this exact release for chapters. The Eagle Slash from Chapter 4? Every rep loaded the disc into your webbing and snapped it back. That is why I call the release the Webbing Whip. The mechanics were built before you ever threw for real.
One final checkpoint on your follow through. Your wrist should "flop" at the end of the throw, just like a basketball player's wrist flops after releasing a jump shot. Khalif teaches it this way: "Like basketball players, I always teach them like we can shoot. There's a follow through. Like volleyball spiking, wrist should flop at the end." If your wrist stays stiff after you release, your fingers never fired. You are pushing the disc, not whipping it. And pushing does not create spin.
The Webbing Whip
This is something I have developed and named myself, and I believe it corrects a misconception that exists in most flick tutorials.
Most people describe the flick release as "snapping your wrist forward." And that is partially right. But it misses the critical interaction between your thumb and your fingers.
Here is what actually happens during a great flick release. Your thumb applies downward pressure on the top of the disc. Simultaneously, your fingers push forward against the rim from underneath. Those two forces, thumb pushing down and fingers pushing forward, create an opposition. A tension. And that tension releases through the webbing of your palm, the soft skin between your thumb and index finger.
The disc does not just fly forward off your fingertips. It whips through the webbing. The thumb and fingers work against each other like two hands wringing a towel, and the disc shoots out of the gap between them with tremendous spin.
After the release, your hand should follow through like a basketball shot. Push through. Do not recoil your hand backward. Extend forward toward your target. The follow through ensures that all the energy transfers into the disc instead of being pulled back into your arm.
The Eagle Slash from Chapter 4 trained this exact webbing release without you realizing it. Every time you slashed forward and the disc moved through the webbing and then snapped back into striking position, you were practicing the mechanics of the Webbing Whip. The motion is the same. Now you just let the disc go.
Key Drills and Teaching Methods
Several of the best coaches and players I have interviewed have developed specific drills for learning the flick. Each one isolates a different aspect of the throw, and together they build the complete motion.
Khalif's Table Drill. "When I throw my flick, my flick goes on a table, back to forward," Khalif told me. "Put the disc on a table, slide it back on the table, and drive it forward on the table." Instead of tilting the disc during the throw, Khalif keeps it flat throughout the entire motion, like he is sliding a plate across an invisible table. Then at the very last moment, he adjusts his body angle to create the IO or OI tilt he wants. Practice this: hold the disc flat, slide it back, drive it forward. Keep it flat the whole time. Repeat until the flat motion feels completely natural. Only then start adding body tilt for angles.
Khalif's Behind the Back Drill. This drill forces you to isolate your wrist from the rest of your arm, and it is the cure for wobbly throws. Reach behind your back with your non throwing hand and grab your throwing arm's elbow. Lock it in place. Now try to throw the disc five yards using only your wrist. Your elbow cannot move. Your arm cannot extend. All you have is the wrist snap. If the disc wobbles, it is because you are not snapping hard enough. This drill makes it impossible to cheat with your arm.
Brent Steepe's Belt Drill. Brent, founder of the Detroit Mechanix, takes wrist isolation even further. Tie your forearm to your torso with a belt. Now throw with just your wrist. Then, keeping the belt on, add torso rotation. Feel how the rotation of your body adds power even when your arm cannot move. Finally, remove the belt and add full arm extension as the natural conclusion. This progression teaches you something profound: arm extension is NOT where the power comes from. The power comes from the wrist. The arm is just the delivery system.
Eric Knudsen's T-shirt Barrier. Eric, who has been playing Ultimate for 50 years, has a simple fix for the most common flick mistake. Hold a t-shirt at hip level. If your arm extends past the shirt barrier, you are over extending. "Don't bring your hand past your hip," Eric says. "And they constantly do that." The flick is all snap, no reach. If your arm is extending way out past your body, you are using your arm for power instead of your wrist. The t-shirt keeps you honest.
Alex's Elbow Cue. Alex, a professor and handler at our DC area pickup games, gave me an image that stuck: "Imagine your elbow is tied to your torso with a piece of toilet paper, and you don't want to break it." Your elbow should stay close to your body during the flick. Not tucked behind you, but not flying out wide either. Close and controlled. The toilet paper image reminds you to keep it gentle and connected.
Ryan's string Cue. Ryan, a local coach in DC, said imagine someone has your elbow tied on a string and it is being pulled by that string. So when you go to throw, you lead with your elbow strongly to coil back your hand and wrist. Then, snap with your wrist and your fingers in a fluid flow.
The Flick Motion: Step by Step
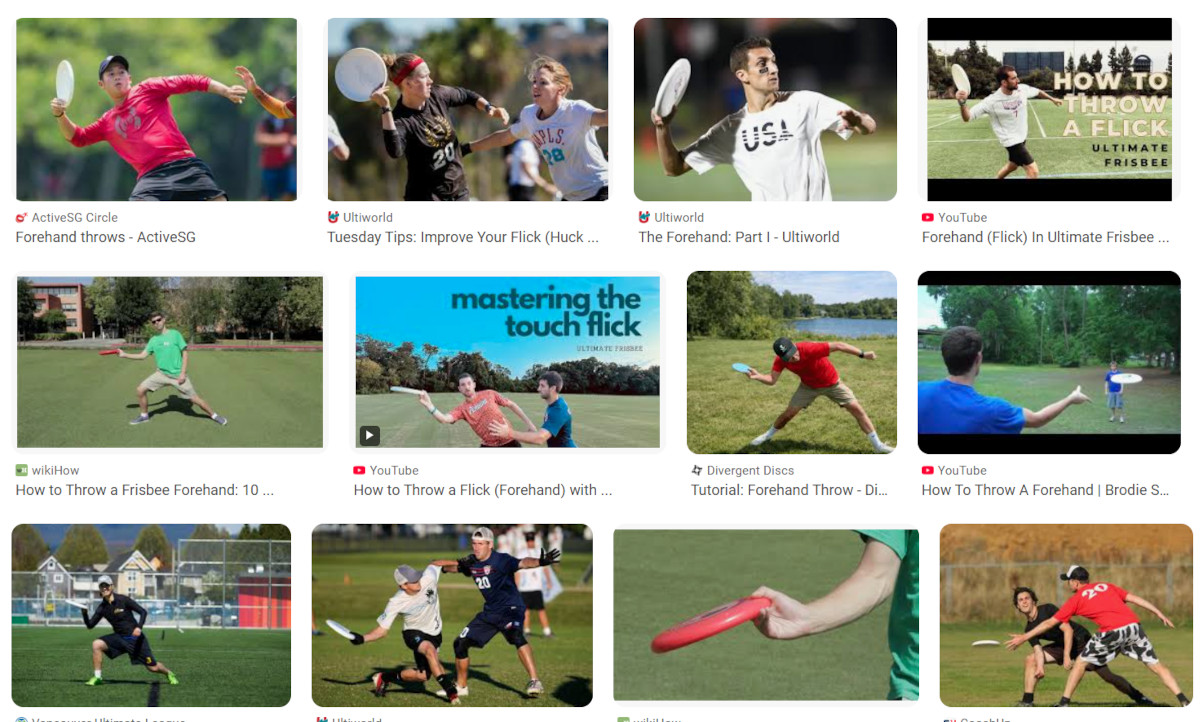
For Beginners. Start simple. Stand fairly stationary. No fancy footwork. No hip rotation. Just your arm, your wrist, and your fingers aiming at a target 10 feet away.
1. Find your grip. Split finger or closed finger, whichever you are working with.
2. Stand sideways to your target. Your throwing side faces the target.
3. Cock your wrist back as far as it will go. Load up the snap.
4. Snap forward. Wrist leads, fingers push through the webbing.
5. Follow through. Wrist flops like a basketball shot. Hand points at the target. Like shooting webbing out of your wrist if you were a spider person!
That is the beginner flick. Wrist and fingers only. No body, no hips, no torso. Just learn the release. Learn the spin. Get comfortable throwing 10 feet, then 15, then 20. Do not chase distance yet. Chase consistency.
For Intermediate. Now you add the body. The kinetic chain for the flick is the same concept as the backhand, just from the other side.
Hips twist back, then drive forward. Torso rotates with the hips. Shoulder follows the torso. Arm extends out, NOT tucked in. This is a common mistake. You want your elbow almost in front of your body so you are using the full extension of your arm like a whip, not pulling it in tight against your ribs. Then the wrist snaps. Then the fingers push through and release. Then the follow through.
One tip that I discovered and use regularly: I bend my knees. I turn my foot and bend both knees so I am low to the ground. Then I do the flick motion as I push myself up from that low position. Something about the upward push creates a more stable, straight path for the disc. It gives it more spin and it works. Try it.
Sitting Down or Kneeling
A super powerful drill to isolate your arm and wrist is to throw the flick when sitting down or kneeling. Try not to twist your torso much, instead focus all of your energy on the arm, elbow, and wrist. Spread your arm out like a wing and whip the disc by pushing your fingers on the rim as firm as you can to generate spin. Try it! Sitting while throwing the flick will elevate your throwing ability so fast!
Release Angles for the Flick
The IO and OI angles work the same way on the flick as they do on the backhand, just mirrored.
Inside Out (IO): The disc tilts away from your body on release. It curves back toward the middle as it flies. This is the most common flick angle and the most useful for throwing around a mark. You can usually get more power on the IO flick. It is the throw you will use 80% of the time.
Outside In (OI), The Blade: The disc tilts toward your body on release. It fades away sharply, often coming down at a steep 75 degree angle. This is more advanced and situational, but when you need it, nothing else works.
Here is a trick for beginners who are struggling to get spin: do not try to throw flat at first. Instead, throw with the disc almost vertical, hanging down at about a 75 degree angle. When you launch it inside out from this steep angle, you will find it much easier to generate spin. The disc has to travel less distance through the air to complete its rotation. Once you have the spin, gradually flatten out the angle over dozens of throws until you can throw it flat.
The three release heights:
High Release Flick. You elevate your hand close to your head and throw with your wrist and arm from up there. Very little torso movement. It is all arm, elbow, wrist, and fingers. The high release flick is virtually unguardable because nobody can get their hands up there in time. But you cannot throw it very far, and it tends to float, which means wind can take it. Best for short distance throws over the mark's hands.
Low Release Flick. The exact opposite. You sweep the disc from almost your knees and do a big inside out launch. This is where the most power lives. The low release flick is the throw that goes 50 or 60 yards. But it is very hard to control because the release point is so far from your body's center of gravity. And defenders can block it if they are in your lane. Best for long distance hucks when you have a clear path.
Straight Release Flick. Your bread and butter. Released from hip to chest level. You want it to go straight and true, arriving somewhere between your target's knees and chin. A slight push down with your thumb on release can create a gentle air bounce that gives the disc touch, so it does not arrive like a bullet. This is the flick you will throw most often.
Making Your Flick Catchable
Here is a problem with the flick that nobody talks about until it becomes a problem: many flicks are simply uncatchable.
The flick generates so much spin that it comes in like a laser. Players call it "sauce." A lot of sauce. When you launch a flick, it is usually coming in super fast, either with an inside out edge or dead straight. And if you put an outside in angle on it, it gets blady and comes down quick. There is no gentle version by default. That is just the nature of the spin you have to put on it.
So how do you make a flick arrive softly? The trick is to put a little tail on it. This is the same concept as the air bounce on the backhand side: you drag the bottom of the disc while pushing down on top with your thumb, so the disc is not flying perfectly flat through the air. The tail drags slightly, and just like an airplane with its nose up, that causes the disc to lift, float, and settle instead of coming in hot. A buttered disc can even drop down gently into a basket. A flat laser flick simply cannot do that.
That is what I call putting butter on the disc. And I will be honest with you: buttering the flick side is one of the most difficult things you can do with a disc. Only a few people I have ever met can do it consistently. I can sometimes do it if I crouch down, almost dropping one knee toward the ground, and then rise back up through the throw while pushing my thumb down to create that tail. And you still have to generate all the spin the flick needs at the same time. It is much easier said than done. But it can be done, and it is the ideal throw for a receiver running onto the disc.
That is the real skill: knowing who you are throwing to. Sometimes a throw has to hit a certain window at a certain time, and it needs all that speed and strength. But if you are throwing to someone who cannot catch too well, you cannot send them a bullet. Only a few people can catch those.
And this, by the way, is exactly why players develop their off hand. Instead of forcing a hot flick, you throw a lefty backhand, or a thumber, or a push pass into the same spot, and it arrives much more gently. Think of it like disc golf: you are trying to land the disc in the basket softly. Rocket it in there and it might stick, but chances are it dings off. You want it coming in nice and easy.
So learn the buttered flick if you can. It takes lots and lots of practice, and most of your attempts will fail for a long time.
PART 3: PUTTING THEM TOGETHER
The Flick to Backhand Flow
In Chapter 4, you learned a drill called the Flick to Backhand Flow. You held one disc and alternated between slashing it forward in a flick motion and pushing it forward in a backhand motion, back and forth, without releasing. At the time, it might have felt like an abstract exercise. Now you understand exactly what it was training.
In a game, the moment you catch the disc, you have a decision to make. Flick or backhand? That decision, and the grip change that comes with it, has to happen in a fraction of a second. The defender is in your face. The stall count is starting. Your cutter is making their move. There is no time to think about which throw to use. Your hands have to know.
The Flick to Backhand Flow drill built that automatic transition. Now that you understand both throws, go back and do that drill again. It will feel completely different. The transitions will be faster. The grips will feel more natural. And you will start to understand, physically, in your muscles, that the backhand and the flick are not two separate skills. They are two expressions of the same skill: controlling a disc and sending it where it needs to go.
Solo Practice Plan for Both Throws
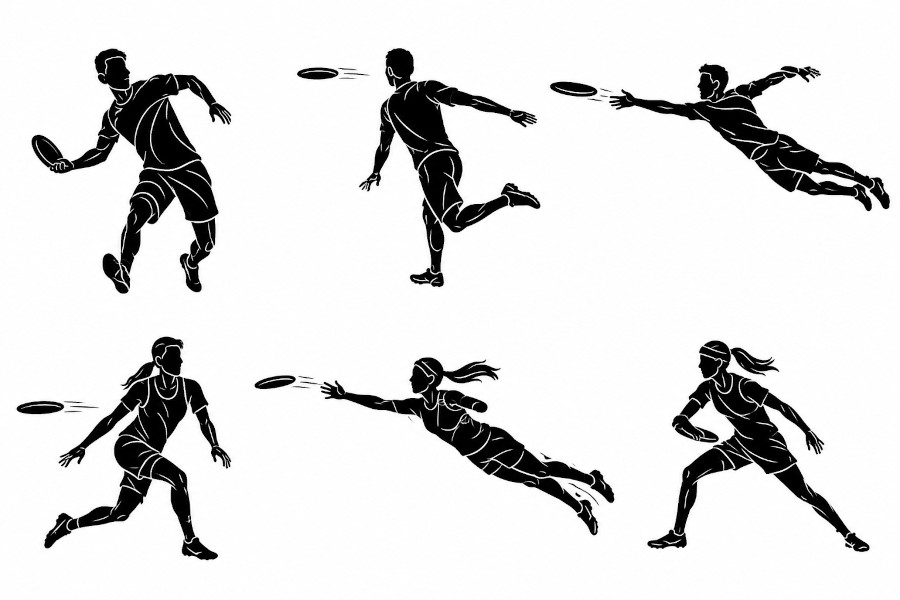
Here is how to structure a solo session that builds both throws simultaneously. You need your target (trash can, cone, tree, whatever) and at least two discs.
The alternating set: 10 backhands at the target. Then 10 flicks at the target. Then 10 backhands. Then 10 flicks. Alternate until you have thrown 50 of each. Track how many hit or come close. This gives you a direct comparison between your two throws and shows you where the gap is.
The angle set: 10 IO backhands. Then 10 IO flicks. Then 10 OI backhands. Then 10 OI flicks. This builds your angle control on both throws.
The distance ladder: Start 10 feet from your target. Throw 5 backhands and 5 flicks. Move back to 20 feet. Repeat. Move to 30. Repeat. Keep going until you cannot reach the target consistently. That is your current effective range. Write it down. Come back next week and beat it.
Ben Wiggins' "Throw Hard" drill is simple and powerful: throw hard at any distance. It does not matter if the target is 10 feet or 40 feet away. Just throw hard. This smooths out hitches in your mechanics because your body moves too fast for them to happen. Hitches are hesitations, little pauses in the kinetic chain where your brain is second guessing the motion. When you throw hard, there is no time to hesitate. Your body just does it. And what it does naturally, without thinking, is usually closer to correct than what it does when you overthink.
Distance benchmarks:
→ Beginner: 15 yards for both throws.
→ Intermediate: 30 yards for both throws.
→ Advanced: 45 yards for both throws.
→ Legend: 60+ yards for both throws, with both hands.
Track your distance weekly. Celebrate the progress. And remember: every session, spend at least 5 minutes throwing with your off hand. The Legend tier is waiting for the players who do.
The Hammer and Scoober Connection
Before we close this chapter, here is a preview of what comes next. Once you have a solid flick grip, you already have the hammer throw. Take your flick grip, the exact same finger and thumb position, and turn the disc upside down. Now throw it over your head. That is the hammer.
The scoober is similar but with a different release point, almost like an inverted flick that floats instead of slicing. Both throws use the same grip foundation you just built in this chapter.
Learning the flick grip does not just give you one throw. It gives you an entire family of throws. We will cover the hammer, scoober, and thumber in full detail in the next chapter. For now, know that the grip work you did today is paying dividends you have not even collected yet.
Wrap Up
◆ The backhand and the flick are your two foundational throws. Like a boxer's jab and cross, you need both to be complete.
◆ The backhand is the most natural throw. Your body already knows how to do it. Now refine it with the coil and uncork motion, the kinetic chain, and the grip pressure sequence.
◆ The flick is harder because your body is not naturally trained for the motion. That is okay. Persistence beats talent. Even a 2x AUDL MVP is still working on his flick.
◆ The wrist snap is non negotiable for both throws. Everything else can vary. The snap cannot.
◆ Find YOUR grip through experimentation. A hundred bad throws before a good one. That is the process.
◆ The Webbing Whip: thumb pushes down, fingers push forward, the disc whips through the webbing. Follow through like a basketball shot.
◆ Use Khalif's Table Drill to learn flat throws, his Behind the Back Drill to isolate your wrist snap, and Brent Steepe's Belt Drill to discover that arm extension is not where power lives.
◆ 80% power flicks are better than 100% power flicks. The best throw is the one that can be caught.
◆ Practice in all conditions. Wet, dry, windy, hot, cold. The players who can throw when the disc is slippery are the players who practiced when it was slippery.
◆ IO and OI angles are fundamental vocabulary. Master IO first. It is your most common and most powerful angle.
Action Steps
→ Today: Find a target. Throw 50 backhands and 50 flicks. Do not worry about anything except spin. Just get it spinning.
→ This week: Experiment with all the grip options for both throws. Give each one at least 20 throws before switching. Find what feels like home.
→ Try Khalif's Behind the Back Drill for the flick. Lock your elbow. Throw 10 with just your wrist. Feel the snap.
→ Try the Table Drill. Keep the disc flat. Slide it back, drive it forward. Flat the whole time. Then add body tilt at the end.
→ Throw 10 IO backhands, then 10 IO flicks. Then 10 OI of each. Feel how your body changes position for each angle.
→ Try throwing your flick at 100% power, then 80%, then 60%. Find the sweet spot where it has authority but is still catchable.
→ Practice in wet conditions at least once this week. Spray the disc with water or practice right after it rains. Feel how the slippery surface changes your grip and release.
→ Track your distance for both throws. Write it down. Come back next week and beat it.
Mentor's Closing
My dad taught me the backhand in a park in Oklahoma when I was a kid. I did not learn the flick until years later, and it took me over a decade to get it to the advanced level. I am still working on it. I still practice it every week. And every year, it gets a little more reliable. A little more dangerous. A little more mine.
That is the truth about these two throws. They are not skills you learn once and check off a list. They are skills you refine for as long as you play the game. There is always a smoother release. Always a tighter spiral. Always a little more distance you can find. The ceiling does not exist.
But the floor does. And you just built it. You have a backhand. You have a flick. You have two throws that cover every angle on the field. You have a jab and a cross.
Now go outside, find your target, and throw. A hundred times today. A hundred times tomorrow. And when you miss, remember what David Lingua told me on that humid Saturday at Hyattsville.
"Keep doing that. Eventually you'll dial in where to release it."
He was right. :)